
Raspberry Pi Google Wall Calendar Project
Revised: 8-8-2017
Project Background:
I’ve been hearing a lot about Raspberry Pi’s lately and thought it was time for me to get in on the action to see what they are all about. Before starting in on this endeavor, I had a general idea of what a Raspberry Pi was, but I had no idea how awesome they are or what really could be done with them.
For those of you that don’t know what a Raspberry Pi is, it’s basically a very small, low cost computer (approx. $35) that can do amazing things. You can use them for almost anything, such as high altitude photography, learning to program, home weather stations, time lapse video recorders, mini arcade cabinets, thin clients…. You are essentially limited by only your imagination.
To begin learning more about them, I started off by going to raspberrypi.org. It’s the homepage of the Raspberry Pi Foundation, which oversees it’s development. It’s a great place to start learning all about them. They have recent news, project ideas, operating system downloads, user forums, teacher resources and a lot of great documentation.
One of my goals recently has been to get more involved with Linux and learning more about the Raspberry Pi’s goes hand-in-hand with that, being that the default operating system for them, Raspbian, is Debian Linux based. From my experience, you’ll want to have a good basic understanding of Linux to get the most out of them.
Once I felt I had a good understanding of Raspberry Pi basics, I began to search for project ideas. A very helpful website for project resources and ideas is http://www.instructables.com/id/Raspberry-Pi-Projects. It’s the site I used to get a lot of information for this project.
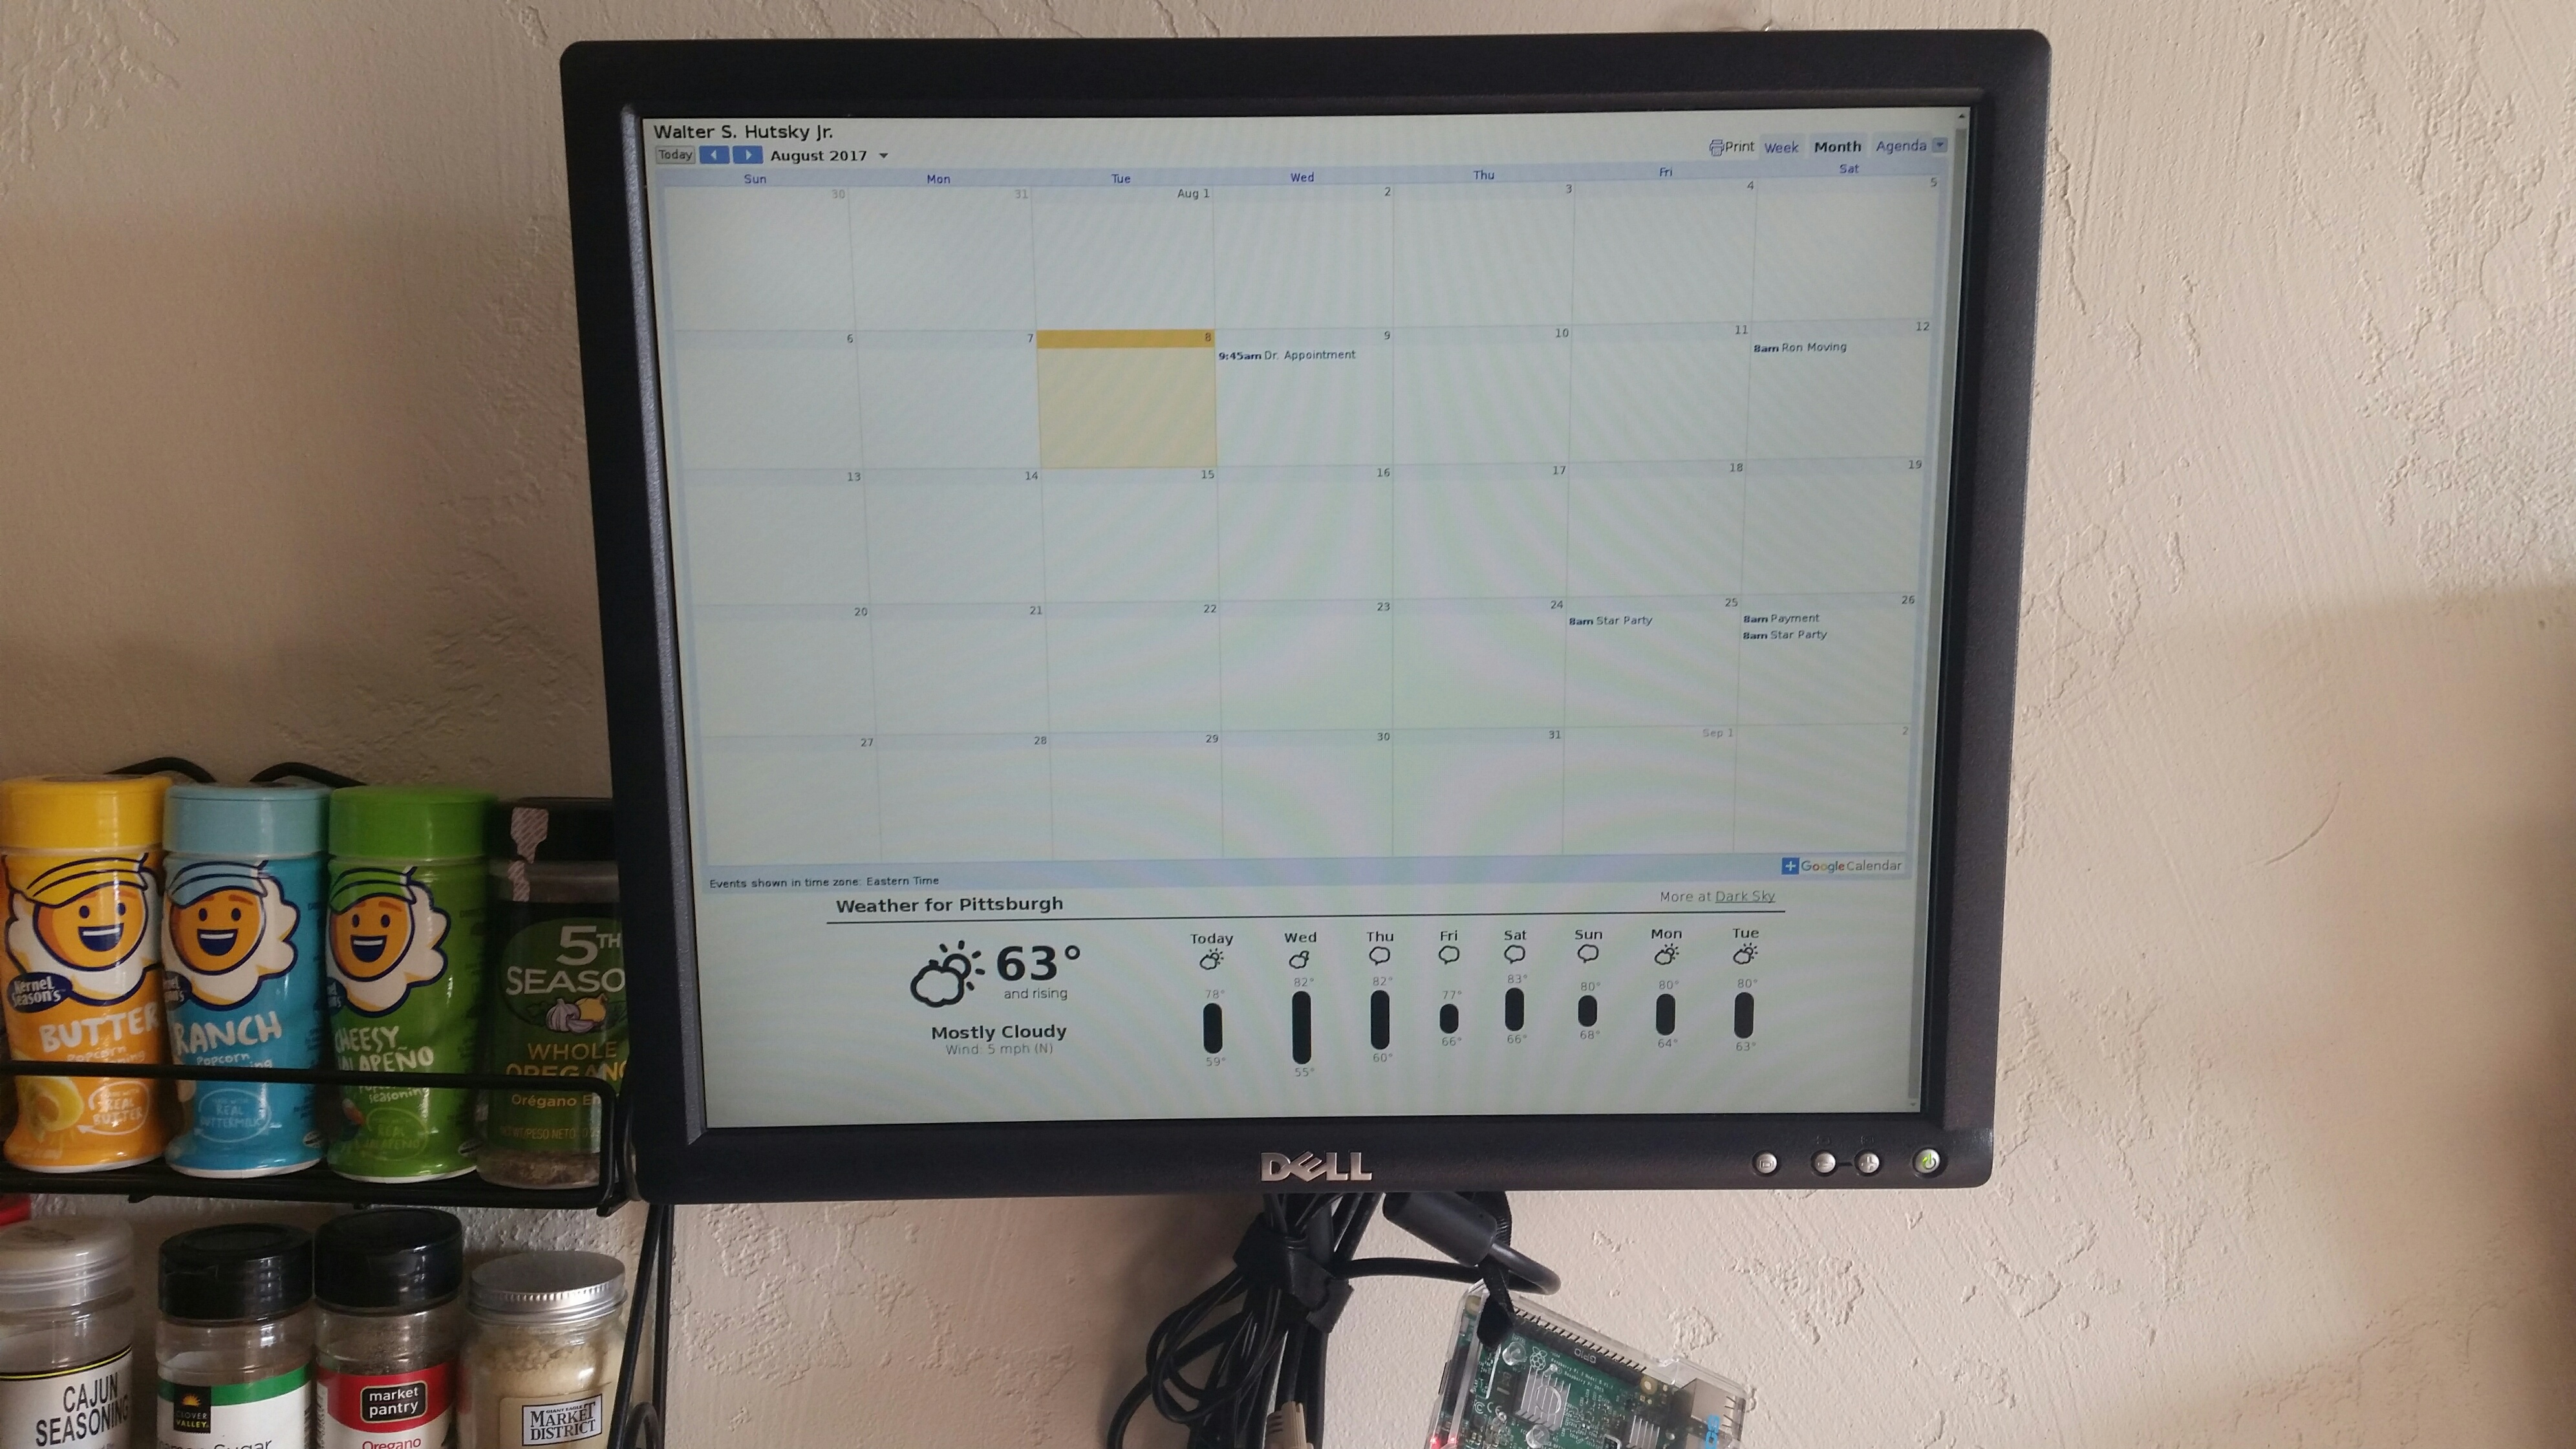
After searching through many different projects, I decided to build a Google Wall Calendar, as gift for my girlfriend Mary. I have a standard wall calendar in my kitchen, but it seems so limited, since I mainly use my Google Calendar for everything.
With Google, you can store all calendar events there and sync everything across all of your devices. I thought it would be very useful and would make a nice conversation piece. If you wanted, you can easily modify this project to display anything you wanted. As you’ll see below, I modified the calendar to display the weather as well.
Raspberry Pi 3 Media Center Kit:
To complete this project, I first needed a Raspberry Pi so I ordered a Raspberry Pi 3 Media Center Kit from Vilros on Amazon.com. I chose this kit because I liked how it came with everything I needed to get started, such as an SD card, HDMI cable, and case. Below is a link to the kit I purchased, along with detailed specifications.
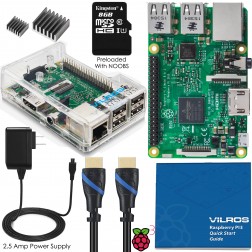
Raspberry Pi 3 Media Center Kit Details:
Product Website: http://www.vilros.com/raspberry-pi/raspberry-pi-kits/raspberry-pi-3-media-center-kit.html
IMPORTANT: The included 8GB SD Card in this kit allows the Raspberry Pi to operate with OSMC (XBMC)–RASPIAN & OPENELEC ONLY—-This Kit Will Not Operate with Windows 10 IoT
Build a Raspberry Pi Media Center With This Raspberry Pi Media Center Kit from Vilros.
The Kit includes the new Raspberry Pi 3 Model B (Latest Version Released on 02/29/2016)
Raspberry Pi 3 Model B Technical Specifications:
• Broadcom BCM2837 64bit ARMv8 Quad Core Processor powered Single Board Computer running at 1.2GHz
• 1GB RAM
• BCM43143 WiFi on board
• Bluetooth Low Energy (BLE) on board
• 40pin extended GPIO
• 4 x USB2 ports• 4 pole Stereo output and Composite video port
• Full size HDMI
• CSI camera port for connecting the Raspberry Pi camera
• DSI display port for connecting the Raspberry Pi touch screen display
• MicroSD port for loading your operating system and storing data
• Upgraded switched Micro USB power source (now supports up to 2.4 Amps)
Kit Content:
Raspberry Pi 3 Model B
Raspberry Pi Enclosure Case (Clear)–Includes Mounting slot and screws for a raspberry pi camera module (the camera module is not included in this kit)
8GB Micro Sd Card Pre-loaed with NOOBS
SD card Adapter
2500 mA Micro USB Power Supply — 5-Feet Long
High Quality HDMI Cable
Heat-sink for Raspberry Pi – Set of 2 Heat Sink
Vilros Raspberry Pi 3 Quick Start Guide
Additional Project Items Purchased Separately:
-
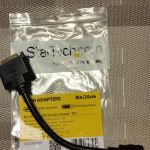
- StarTech HDMI to DVI Adapter- Used for connecting my monitor’s DVI cable to the Pi.
-

- Velcro Tie Wraps- Used for securing cables and attaching the Pi to the back of the monitor.
-

- VideoSecu Arm Mount – Any mount should do, but be sure your monitor meets VESA standards if you are to use this.
Assembling the Raspberry Pi 3 Starter Kit:
Please watch the video below to view the initial setup of the Raspbery Pi kit.
Setup Instructions:
These instructions will provide you with the necessary steps to setup a Google Wall Calendar using Chromium, which is the open source web browser Google Chrome is based on. More information on Chromium can be found at www.chromium.org.
- The first step is to install the Raspbian operating system. If you are using the Raspberry Pi kit, power on your device then use the pre-loaded NOOBS (New Out of Box Software) tool to install it. Additional information on the NOOBS setup can be found at www.raspberrypi.org/help/noobs-setup.
Note: These instructions are based on the following version of NOOBS.
2. After you’ve booted to the desktop, configure localization options by clicking the Menu button, going to Preferences, selecting Raspberry Pi Configuration, then clicking the Localization Tab. Here you can set your Locale, Timezone, Keyboard layout, and WiFi Country.

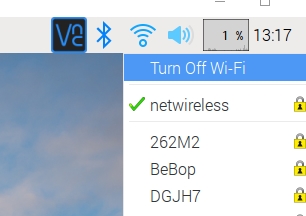
3. Connect your Raspberry Pi to the Internet using either the LAN port or the wireless card. For a wireless connection, click the wireless icon on the toolbar then select your wireless network. In my setup, I’ve used a wireless connection.
Note: Not all Raspberry Pi models have built-in wireless.
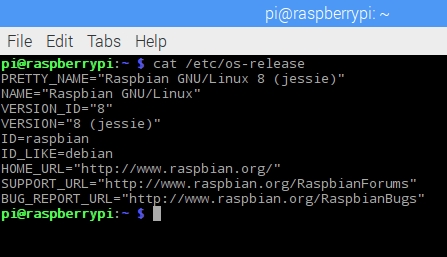
4. Before you go any further, you may want to determine your Raspbian OS version. These instructions are based on Raspbian Jessie with Pixel, which includes the Chromium web browser. Other OS versions may not work. In order to find the version, enter the following from LXTerminal, which is the default terminal (command-line) application in Raspbian.
Note: LXTerminal can be launched using the icon from the task bar at the top of the screen.
![]()
cat /etc/os-release
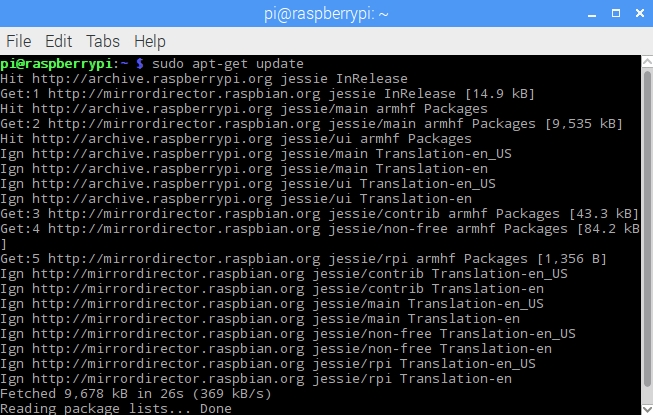
5. Update your system’s package list.
sudo apt-get update
Note: For those of you not familiar with Linux, the sudo command allows you to execute commands as a superuser, which has full administrative rights to a system. Here, it is being used to run the package handler apt-get, to download and install package updates.
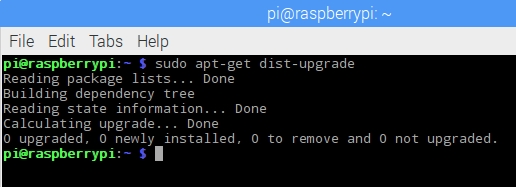
6. Upgrade all of your installed packages to their latest versions. When prompted, press “Y” to continue.
sudo apt-get dist-upgrade
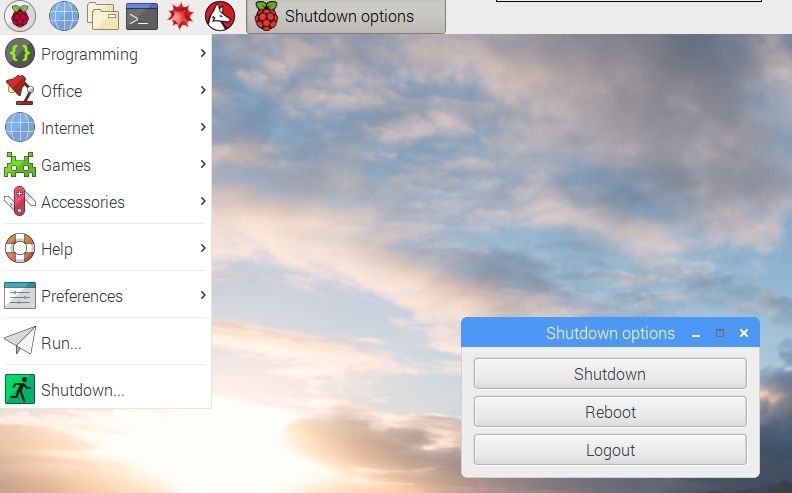
7. Restart your Raspberry Pi by clicking the menu button, selecting Shutdown, then Reboot.
8. Launch Chromium, by clicking menu, Internet then selecting Chromium.
9. Sign into your Google Calendar by going to https://calendar.google.com.
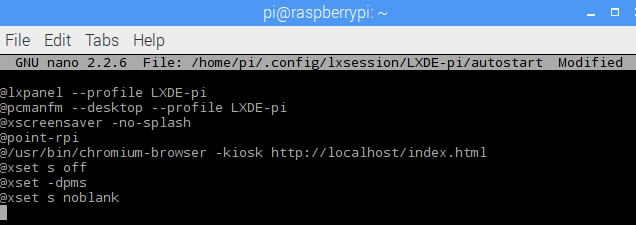
10. Open the Raspberry autostart configuration file by entering the following from LXTerminal.
sudo nano /home/pi/.config/lxsession/LXDE-pi/autostart
Note: For those of you not familiar with Linux, the sudo nano command is launching the nano text editor as the superuser in order to edit the autostart file.
11. Enter the following to configure monitor display settings.
![]()
Disable screen saver
![]()
Disable DPMS (Energy Star)
![]()
Disable blanking the video device
12. Setup Chromium to auto start in kiosk mode by entering the following line in the autostart file.
![]()
Note: The http://localhost/index.html address is used to load the customized website file hosted on your Pi, which you’ll be setting up in later steps. The autostart file should now look like the screen shot below.
13. Press Ctl + X to exit, “Y” to save the changes, then press Enter.
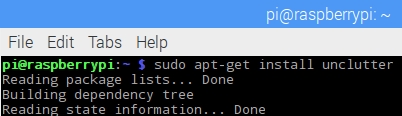
14. Install Unclutter to remove the mouse cursor from the screen.
sudo apt-get install unclutter
15. Install the Apache web server package. We’ll need it for hosting a custom webpage to display both the Google Calendar and weather forecast.
sudo apt-get install apache2 -y

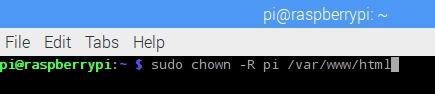
16. Change ownership on the /var/www/html folder by using the shown command so that the default pi user account has write permissions. This will allow you to edit the index.html file in the directory for the calendar webpage.
sudo chown -R pi /var/www/html
Note: If you need additional help with creating or editing file/folder permissions, please refer to this site for additional information. https://www.raspberrypi.org/documentation/remote-access/web-server/apache.md
17. Browse to the /var/www/html directory by using the File Manager. File Manager can be accessed from the task bar.
![]()
18. Right-click on the index.html file then select Text Editor. This will launch the Leafpad text editor

19. Clear out the entire file then enter in the following html code.
![]()
Description: This is for auto-refreshing the page after 3600 seconds (1 hour).

Description: This is the embedded calendar code from Google. It can be obtained from your Google Calendar settings page. The width and height options can be changed depending on your monitor size and display options.
To access the calendar code, do the following:
i. Go to calendar.google.com, click the drop down arrow next to your calendar’s name, then select Settings.
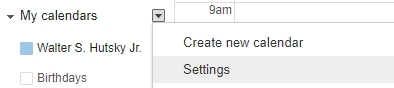
ii. Click the name of your calendar.
iii. Copy the html next to Embed This Calendar.

Description: This is the embedded code for the weather. I got it from https://blog.darksky.net/forecast-embeds, which has very nice weather information you can embed on websites. You’ll want to customize the coordinates and location name, depending on where you live. Please be sure to use valid coordinates for your location or the weather data will not display.
Coordinates must be obtained from the National Weather Service at www.weather.gov, if you are from the United States. I believe this is because forecast.io pulls its weather data from them. If you search for your location, the appropriate coordinates should display for you under where it says “Current Conditions at”.
20. Your index.html file should look similar to the screen shot below. Click File and Save to save the changes.

22. Configure crontab to reboot the pi on schedule by opening LXTerminal, entering crontab -e then pressing Enter.
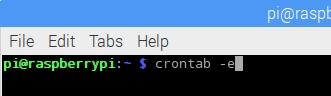
Note: Crontab is used to automatically reboot the pi on schedule to clear errors and dialog boxes. I’ve seen problems where the calendar stops refreshing after a few days and reboot was needed to get it working again. Also, the latest release of Chromium doesn’t include a built in option to disable the session restore bubbles. If the Pi were to lose power, you would be stuck with a prompt to restore tabs.
23. Scroll to the bottom and enter the following two commands. This will schedule a shut down of Chromium then initiate a reboot at 12AM every day of the week.

Note: If you like to adjust the schedule, please refer to the following site: https://www.raspberrypi.org/documentation/linux/usage/cron.md.
24. Press Ctl + X to exit, “Y” to save the changes, then press Enter.
25. Reboot/power-cycle your Raspberry Pi and test to ensure the calendar loads properly.
Note: You may want to pull the power while it is on to see how it loads back up to ensure everything automatically loads properly.
26. All finished!! *celebrate* If you need to do a celebratory safety dance for completing this project, here you go.
Project Notes:
Originally, I was only going to setup a calendar, but thought having the weather along with it would be a great feature to add and I’m glad I did it. I searched many different website for a nice weather display and thought that the one offered by forecast.io was the best looking one available for my needs.
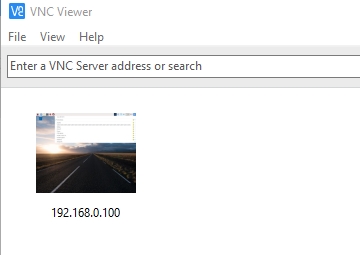
For easy remote access to my device while on wireless, I enabled VNC on my Pi. I then install VNC view on my desktop so that I can RDP into. This makes it very convenient to make changes to it without using a mouse/keyboard connected directly to your Raspberry Pi.
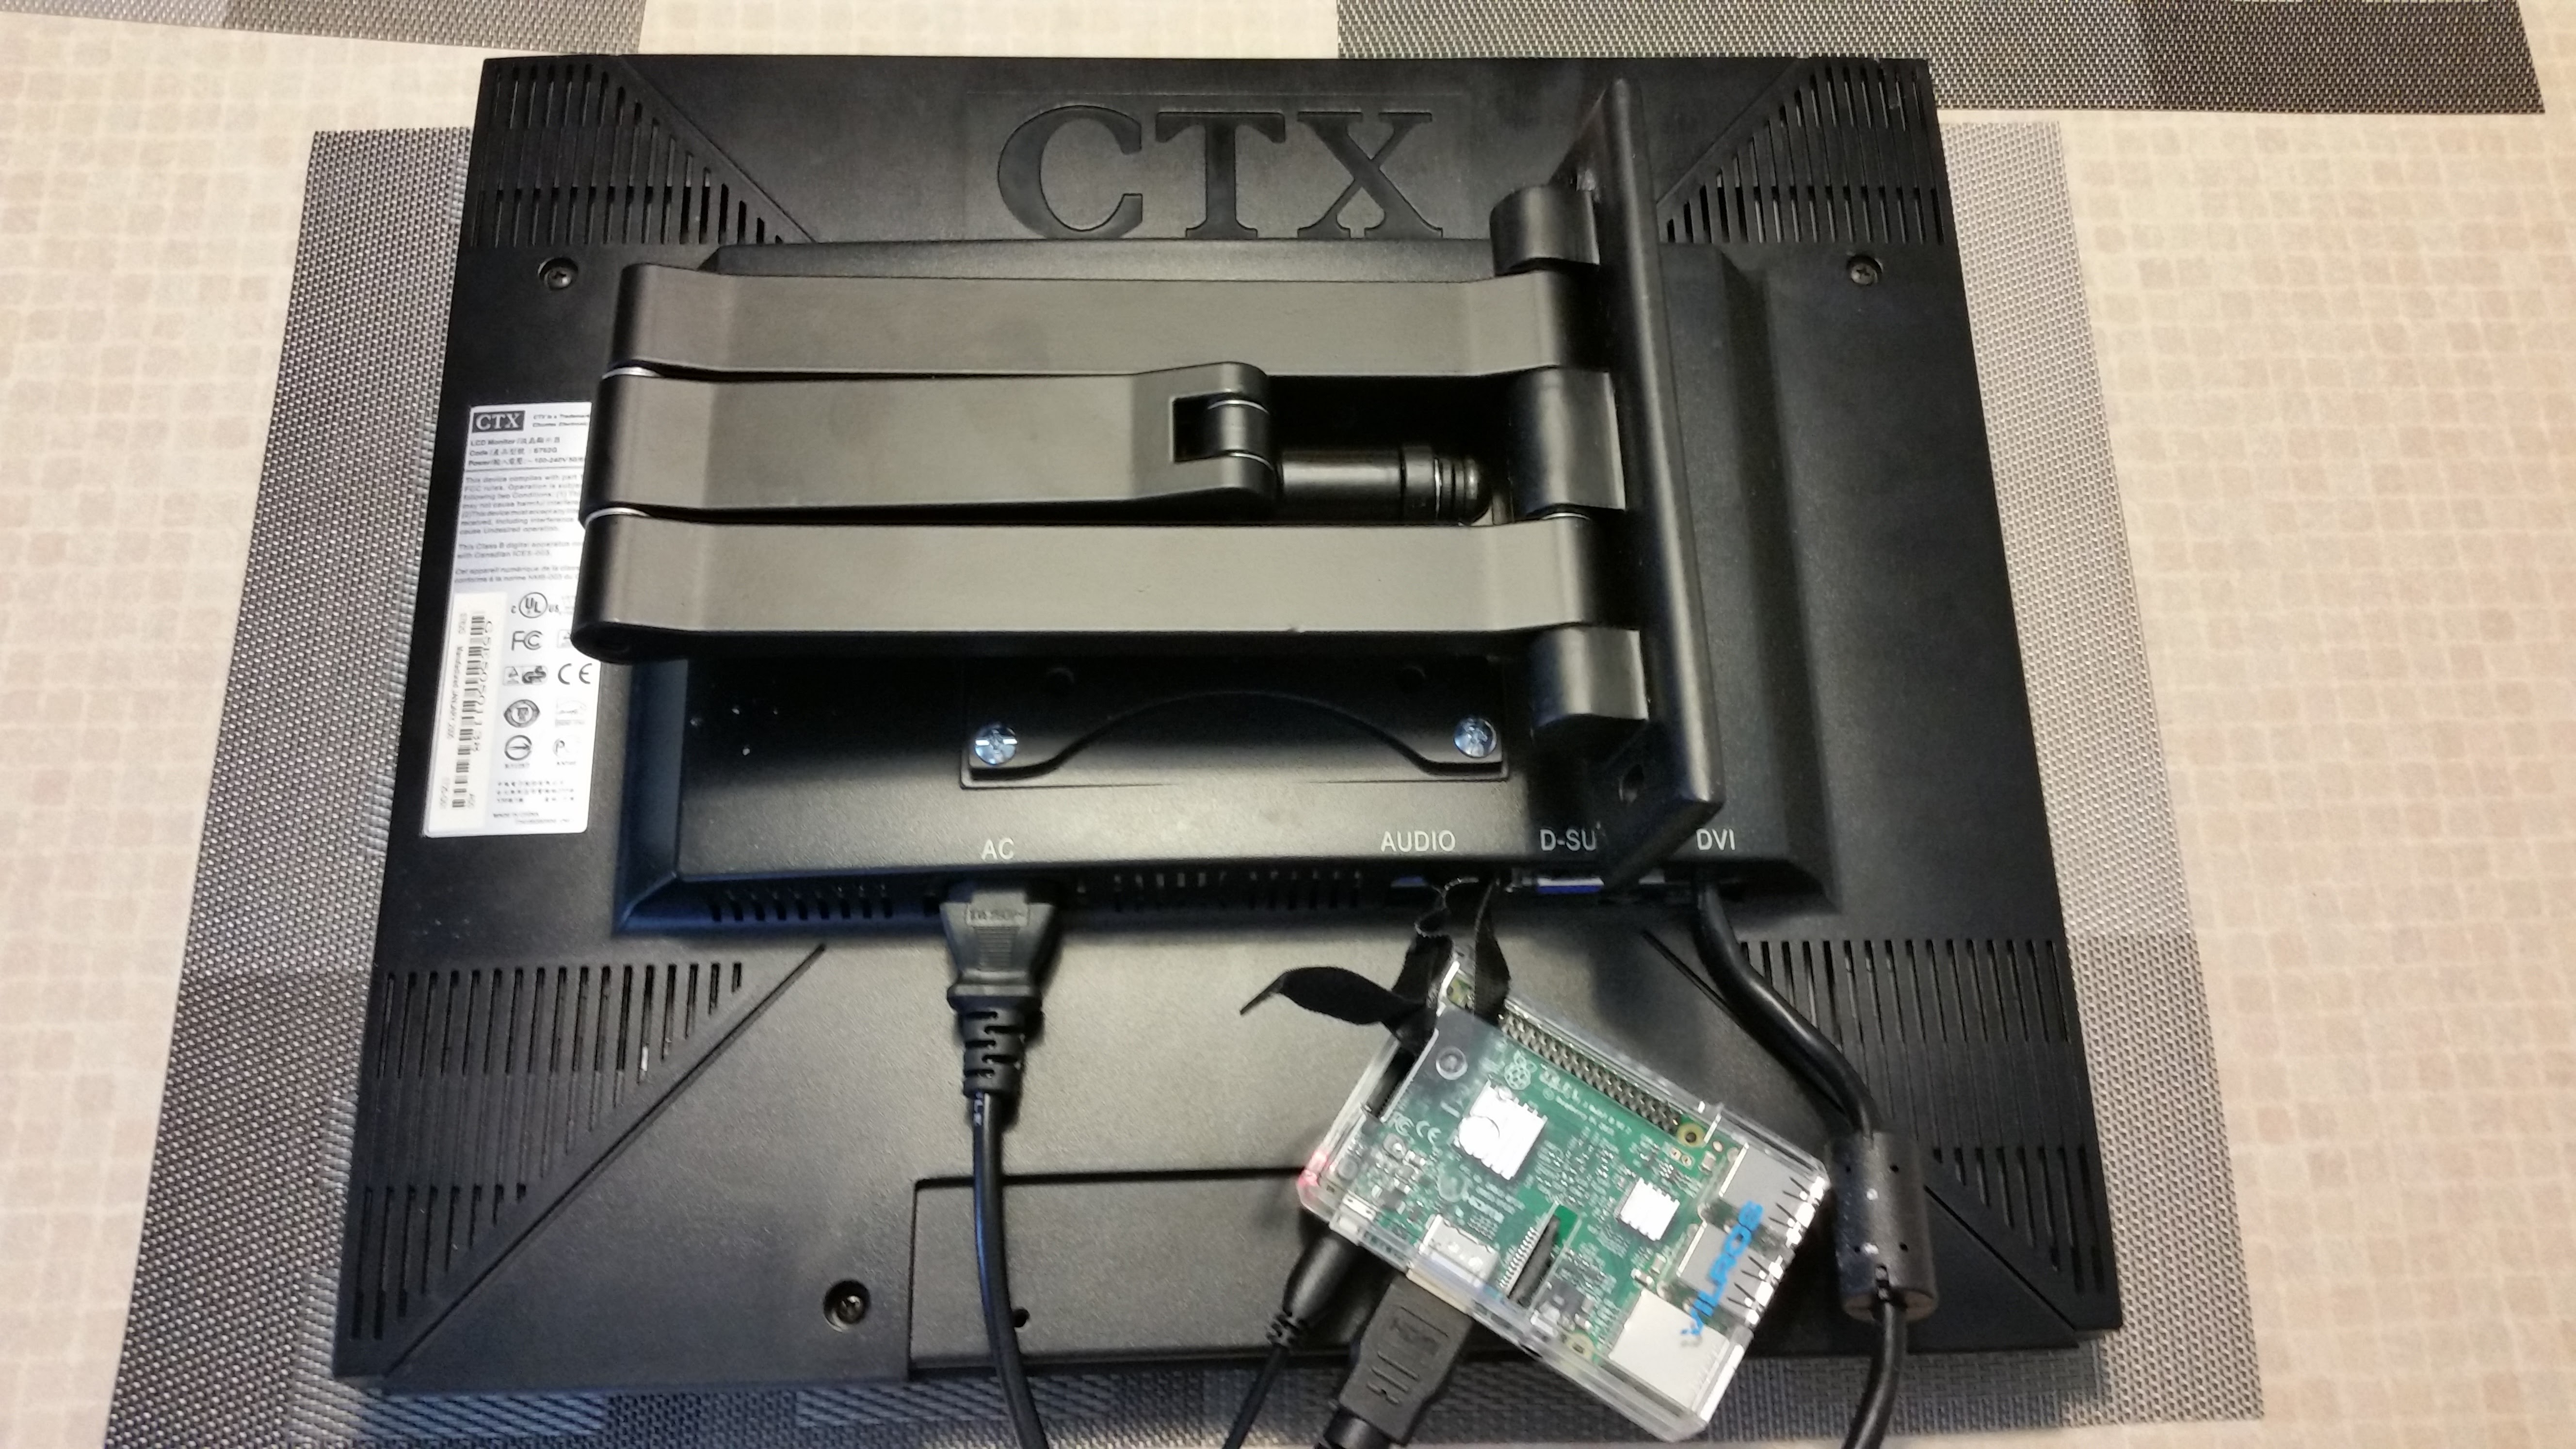
I secured Raspberry Pi and cables behind the a monitor using Velco tie wraps then attached an arm mount to the monitor.
Tip: Once you are finished getting everything setup, I recommend creating an image file of your SD card. If something were to happen to your card or device, you can quickly restore everything from the image back up file. There are a few ways to do this, including using Win32DiskImager.
Special Thanks:
I was only able to figure out how to put together a lot of this project by standing on the shoulders of some giants. I want to give a lot of credit to Piney and Ozua from Instructables.com for much of the information that went to this project and Nick Heath from TechRepublic.com for providing instructions on getting Chromium to install. Below are links to their pages.
http://www.instructables.com/id/Raspberry-Pi-Wall-Mounted-Google-Calendar
http://www.techrepublic.com/article/five-tips-for-getting-the-most-out-of-a-raspberry-pi-3-as-a-pc
http://www.instructables.com/id/Raspberry-Pi-Wall-Mounted-Calender-and-Notificatio/?ALLSTEPS
Help:
I hope these instructions help you create one of of your own or at least give some ideas for some of the amazing things a Raspberry Pi can do. If anyone has any problems or questions with this project, please feel free to reach me at walter@walterhutskyjr.com.