
Nov 17, 2026 · @Walter S. Hutsky Jr.
I just published a blog post to my website by typing one sentence to Claude.
I connected my WordPress site to Claude using WPVibe, which works through MCP (Model Context Protocol), the standard that lets an AI assistant use real tools. I typed “Make a new post called WPVibe a Success! then publish it,” approved the request, and it was live on my site.
This guide is the step-by-step setup I wrote along the way, with the troubleshooting, the security settings, and how it all works under the hood. I’m proud of how it came together.
WPVibe, by SeedProd, connects your WordPress site to AI assistants like Claude, ChatGPT, and Cursor so they can manage content, edit themes, and build pages for you. This guide covers the first steps: getting the plugin installed and confirming your site can talk to WPVibe.
How WPVibe works
WPVibe works through MCP, the Model Context Protocol. MCP is a standard way for an AI assistant to use outside tools. It is a set of agreed rules, not a product, and not a WordPress plugin. Think of it like USB-C: any assistant that speaks MCP can plug into any tool that speaks MCP.
An MCP server is a separate program that offers tools to AI assistants, such as “read posts” or “get site info.” It usually runs as a service on the internet, not inside your website. The assistant, called the MCP client, reads the server’s list of tools, picks the right one for your request, and asks the server to run it. Without an MCP server, an assistant can only talk. With one, it can act.
Is WPVibe a server or a plugin?
Both, and they do different jobs. Setup connects each piece in turn:
| Piece | What it is | Where it runs | What it does |
|---|---|---|---|
| Your AI assistant | The MCP client (Claude, ChatGPT, or Cursor) | Your browser or app | Understands your request, picks a tool, and shows you the answer |
| WPVibe connector | The MCP server, at mcp.wpvibe.ai | WPVibe’s own service on the internet | Offers WPVibe’s tools to the assistant and passes requests to your site |
| WPVibe plugin | A normal WordPress plugin | Your WordPress site | Gives WPVibe a safe way into your site and adds the WPVibe menu and Approval Log |
| Your WordPress site | Your content, theme, and plugins | Your web host | Does the actual work and returns the result |
The plugin alone can’t talk to an AI, and the server alone can’t reach your site. Together they let your assistant work on your site without you copying anything between them.
How a request travels from Claude to WordPress
Your request makes three hops: from you to Claude, from Claude to the WPVibe server over MCP, and from the WPVibe server to your site through WordPress’s REST API. The answer comes back the same way. Steps 1 to 5 carry the request out, and steps 6 to 8 bring the result back.
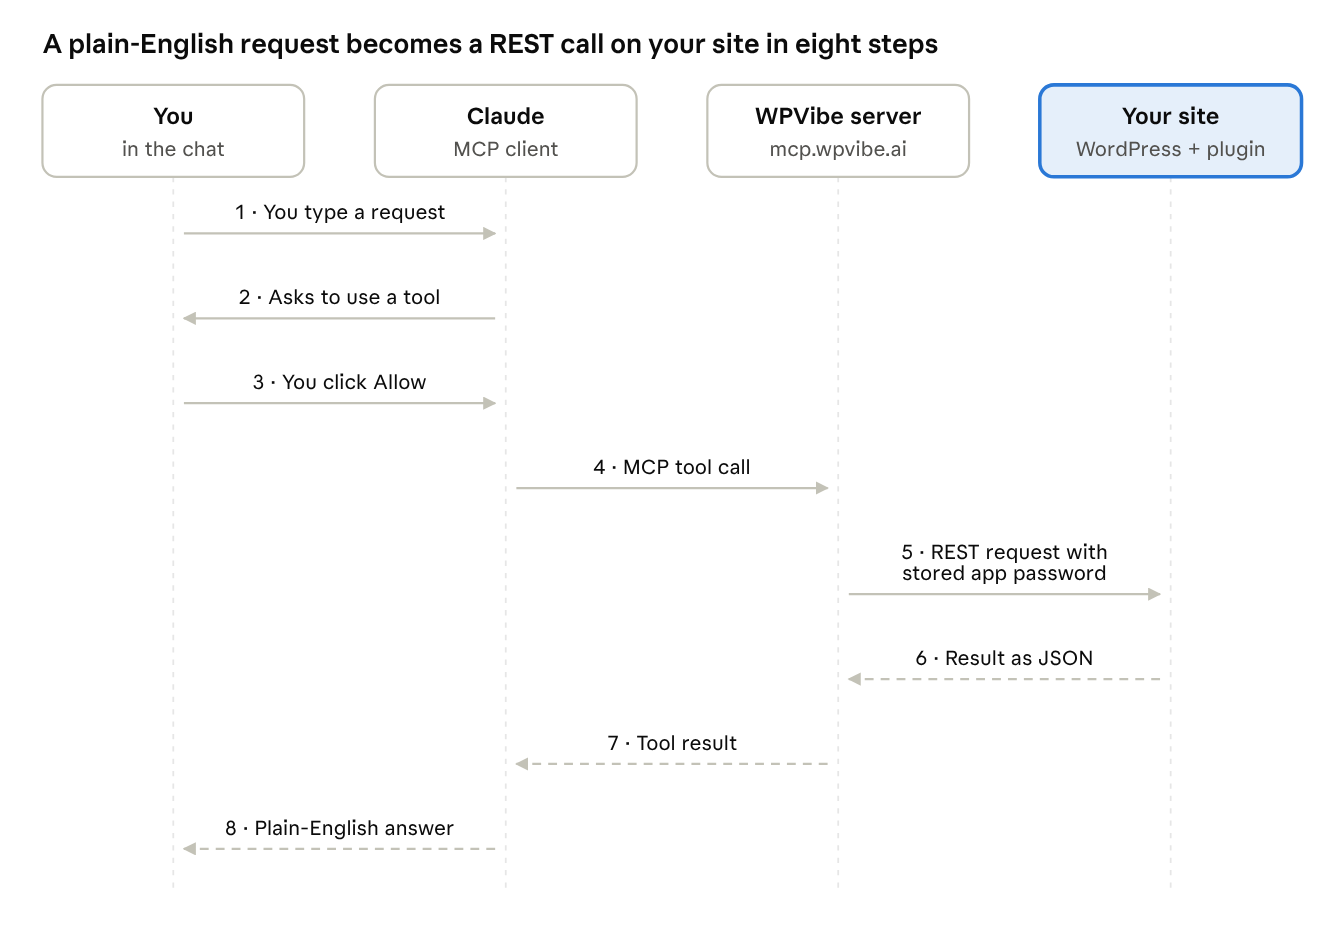
request flow · 4 parties, 8 steps
What happens at each step:
- You ask. You type a request in plain English, such as “List my recent posts.” Claude reads the tools WPVibe offers through MCP and picks the one that fits.
- Claude asks permission. Claude pauses with a Needs your input prompt that names the tool and your site. If you chose Always allow for that tool earlier, Claude skips this step.
- You allow it. Nothing leaves Claude until you approve, unless you have already allowed that tool.
- Claude calls the tool over MCP. Claude sends the tool name and its inputs, such as your site address, to the WPVibe server over the internet. The WPVibe sign-in you completed in Step 3 authorizes this hop. The server checks that your WPVibe account has the site connected. If it doesn’t, you get a “No credentials found” error instead.
- WPVibe calls your site. The server uses the Application Password you approved in WordPress to send a request to your site’s REST API, for example the posts route when you ask for posts.
- WordPress does the work. WordPress checks that the user who approved the connection is allowed to do it, runs it, and returns the result as JSON. A firewall such as Wordfence sees the request first and can block it, which is one way you can end up with a 500 error.
- The server hands the result back. The WPVibe server passes the result to Claude in MCP format.
- Claude answers you. Claude turns the result into a plain-English reply, such as a list of your posts.
Two separate sign-ins make this work. Claude connects to WPVibe with your WPVibe account (the emailed code). WPVibe connects to WordPress with an Application Password that you approved on the Authorize Application page. Your WordPress login password is never typed into the chat or sent to Claude.
Why this makes updating WordPress easier
- No dashboard hunting. You describe what you want instead of clicking through menus, editors, and settings screens.
- One conversation for many tasks. The same chat can read posts, edit content, check plugins and themes, upload media, and audit a page.
- Drafts before live changes. Theme work happens in a draft with a preview link, and nothing goes live until you say to publish.
- You stay in control. Claude asks before running a tool, destructive actions need your explicit approval, and the WPVibe > Approval Log page in WordPress keeps a record.
- No passwords in the chat. You approve access once in WordPress, and the credential is stored by WPVibe, never typed into the conversation.
The assistant is only as careful as the instructions you give it, so check what it plans to do before you approve changes, and keep a backup of your site.
What you’ll need
- A WordPress site where you are an administrator
- The WPVibe plugin by SeedProd
- About 10 minutes
Good to know: WPVibe’s ability features need WordPress 6.9 or newer, and WPVibe can only do what the WordPress user who approves the connection is allowed to do. Tested with: WordPress 7.1.4, PHP 8.4.27, and WPVibe plugin 1.23.0, in November 2026.
Step 1: Install and activate the WPVibe plugin
- In your WordPress dashboard, go to Plugins > Add New and install WPVibe (or upload the plugin zip you received).
- Click Activate.
- A new WPVibe item now appears in the left admin menu. Hover over it to see two pages: WPVibe and Approval Log.
- Click WPVibe. You’ll land on the setup page, which shows a Not connected yet status and a checklist. Step 1, Install the WPVibe plugin, is already checked off with the message “You’re here, plugin is active.”

The WPVibe setup page before connecting, with the WPVibe menu and Approval Log.
Step 2: Check your connection
Step 2 on the checklist asks a simple question: can your site reach WPVibe, and can WPVibe reach your site?
- Click Check site connectivity.
- Wait for the check to finish. If you need to run it again, the button is disabled for a short cooldown (you’ll see a message like “Available again in 36 seconds”).
- Read the result. If everything passes, you’ll see “Connection check passed” and “Site connectivity: Passed,” and Step 3 opens. If you see warnings, use the troubleshooting section below.
Troubleshooting: “Application Passwords are turned off by Wordfence”
WPVibe connects to your site using a WordPress Application Password. If you run the Wordfence security plugin, it may have Application Passwords switched off, and the connectivity check will report:
- Application Passwords are turned off by Wordfence
- Application Password availability: Needs attention
You have two ways to fix it.
Option A (recommended): Allow Application Passwords for WPVibe only
- On the WPVibe setup page, click Allow for WPVibe.
- This permits Application Passwords only for approving a WPVibe connection, and for requests that identify as WPVibe from accounts that authorized one.
- Everything else stays under your security plugin’s policy, so the rest of your site’s protection is unchanged.
- Click Check site connectivity again to confirm.
Option B: Turn off the Wordfence setting
- In your dashboard, go to Wordfence > All Options.
- Open Brute Force Protection.
- Uncheck Disable WordPress application passwords.
- Save your changes, then run Check site connectivity again.
Option B enables Application Passwords for every application on your site, not just WPVibe, so Option A is the safer choice if you don’t need them elsewhere.

The connectivity check showing the Wordfence notice and the Allow for WPVibe button.
If the check returns an HTTP 500 error
You may also see a message like: “The WordPress check did not return JSON (HTTP 500). A login, security rule, or server error may have interrupted it.”
- Refresh the page and run the check once more. A single failure can be temporary.
- If it repeats, click Copy report to clipboard or Download report at the bottom of the check results (or expand Technical details).
- Send the report to your web host and to WPVibe support so they can see exactly what failed.
A 500 error usually means your security plugin’s firewall blocked the check. On my site, Wordfence caused it: the check passed only after I turned Wordfence off, even with Allow for WPVibe already turned on. I turned Wordfence back on once the connection was working. To keep your protection while you set up, try this order instead: leave the firewall on, open Wordfence > Tools > Live Traffic to find the blocked request, then add an allowlist exception for it, or put the firewall in Learning Mode while you finish setup. I haven’t tested the allowlist route myself.
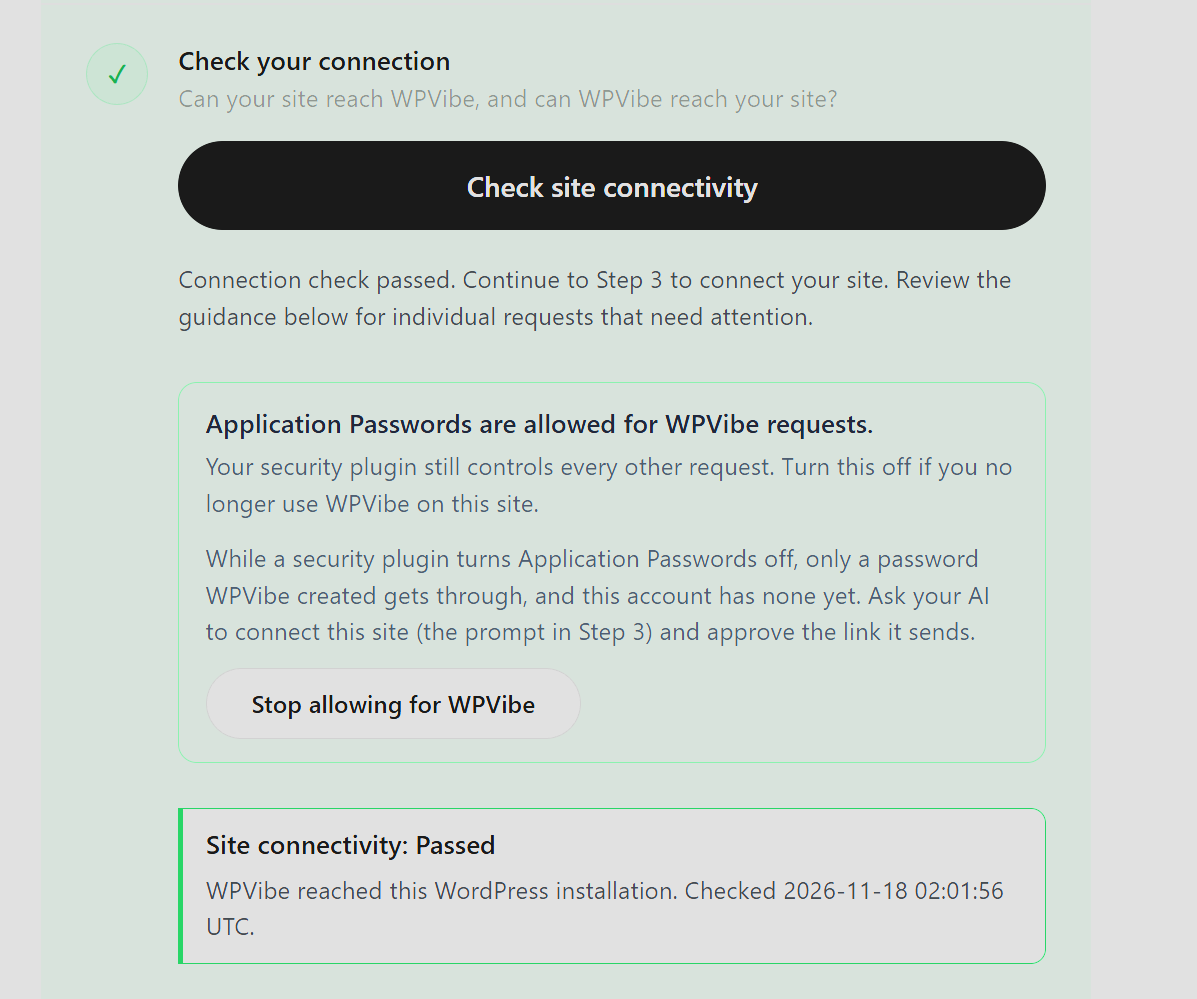
“Connection check passed” with “Application Passwords are allowed for WPVibe requests.”
What is Wordfence, and why I turned it off
Wordfence is a popular free WordPress security plugin. It runs a web application firewall that inspects every request to your site and blocks anything that looks suspicious, such as brute-force logins and known attack patterns. It also scans for malware and keeps a Live Traffic log of what it blocked. That is useful protection, but it can also block legitimate requests, including the ones WPVibe sends to your site’s REST API.
On my site, Wordfence is installed and active, as the plugins list below shows. When I first ran the WPVibe connection check, it failed with an HTTP 500 error. The check only passed after I temporarily turned Wordfence off. Once WPVibe was connected, I turned Wordfence back on, so the site is protected again.
If you hit the same error, try the safer options above first (allow Application Passwords for WPVibe, check Live Traffic, or use Learning Mode). Turning a security plugin off is a last resort, and you should turn it back on as soon as the connection works.
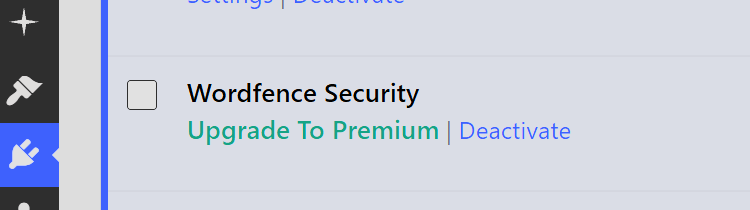
The Plugins page showing Wordfence Security. Deactivating it was what let the connection check pass on my site.
Step 3: Add WPVibe to your AI and connect your site
Once the connection check passes, Step 3 opens. It has two parts: add WPVibe to your AI assistant (A), then tell the assistant to connect your site (B).

Step 3 showing the client buttons, the MCP server address, and the “Connect my site” prompt.
A. Add WPVibe to your AI
If your assistant already has WPVibe, skip to B. Otherwise, click the button for your client:
- Add to ChatGPT: WPVibe has an official ChatGPT app.
- Add to Claude: WPVibe is listed in Claude’s connectors directory.
- Cursor and other clients: Clients such as Cursor and Claude Code add WPVibe as a custom connector. Click Copy next to the MCP server address and paste it into your client:
When the client asks you to sign in, use your WPVibe account.
If you use Claude:
- Click Add to Claude. This opens the WPVibe for WordPress page in Claude’s connectors directory, made by SeedProd LLC.
- Click Connect to Claude and sign in with your WPVibe account when asked.
- Note the Community label next to the name. Claude shows a notice that community connectors get automated checks, but Anthropic doesn’t verify them or control how their tools work or change, so connect only developers you trust.
- If you add the connector manually, use the Claude-specific address shown on the page, https://mcp.wpvibe.ai/mcp/claude. The general address above, ending in /mcp, is for ChatGPT, Cursor, and other clients.
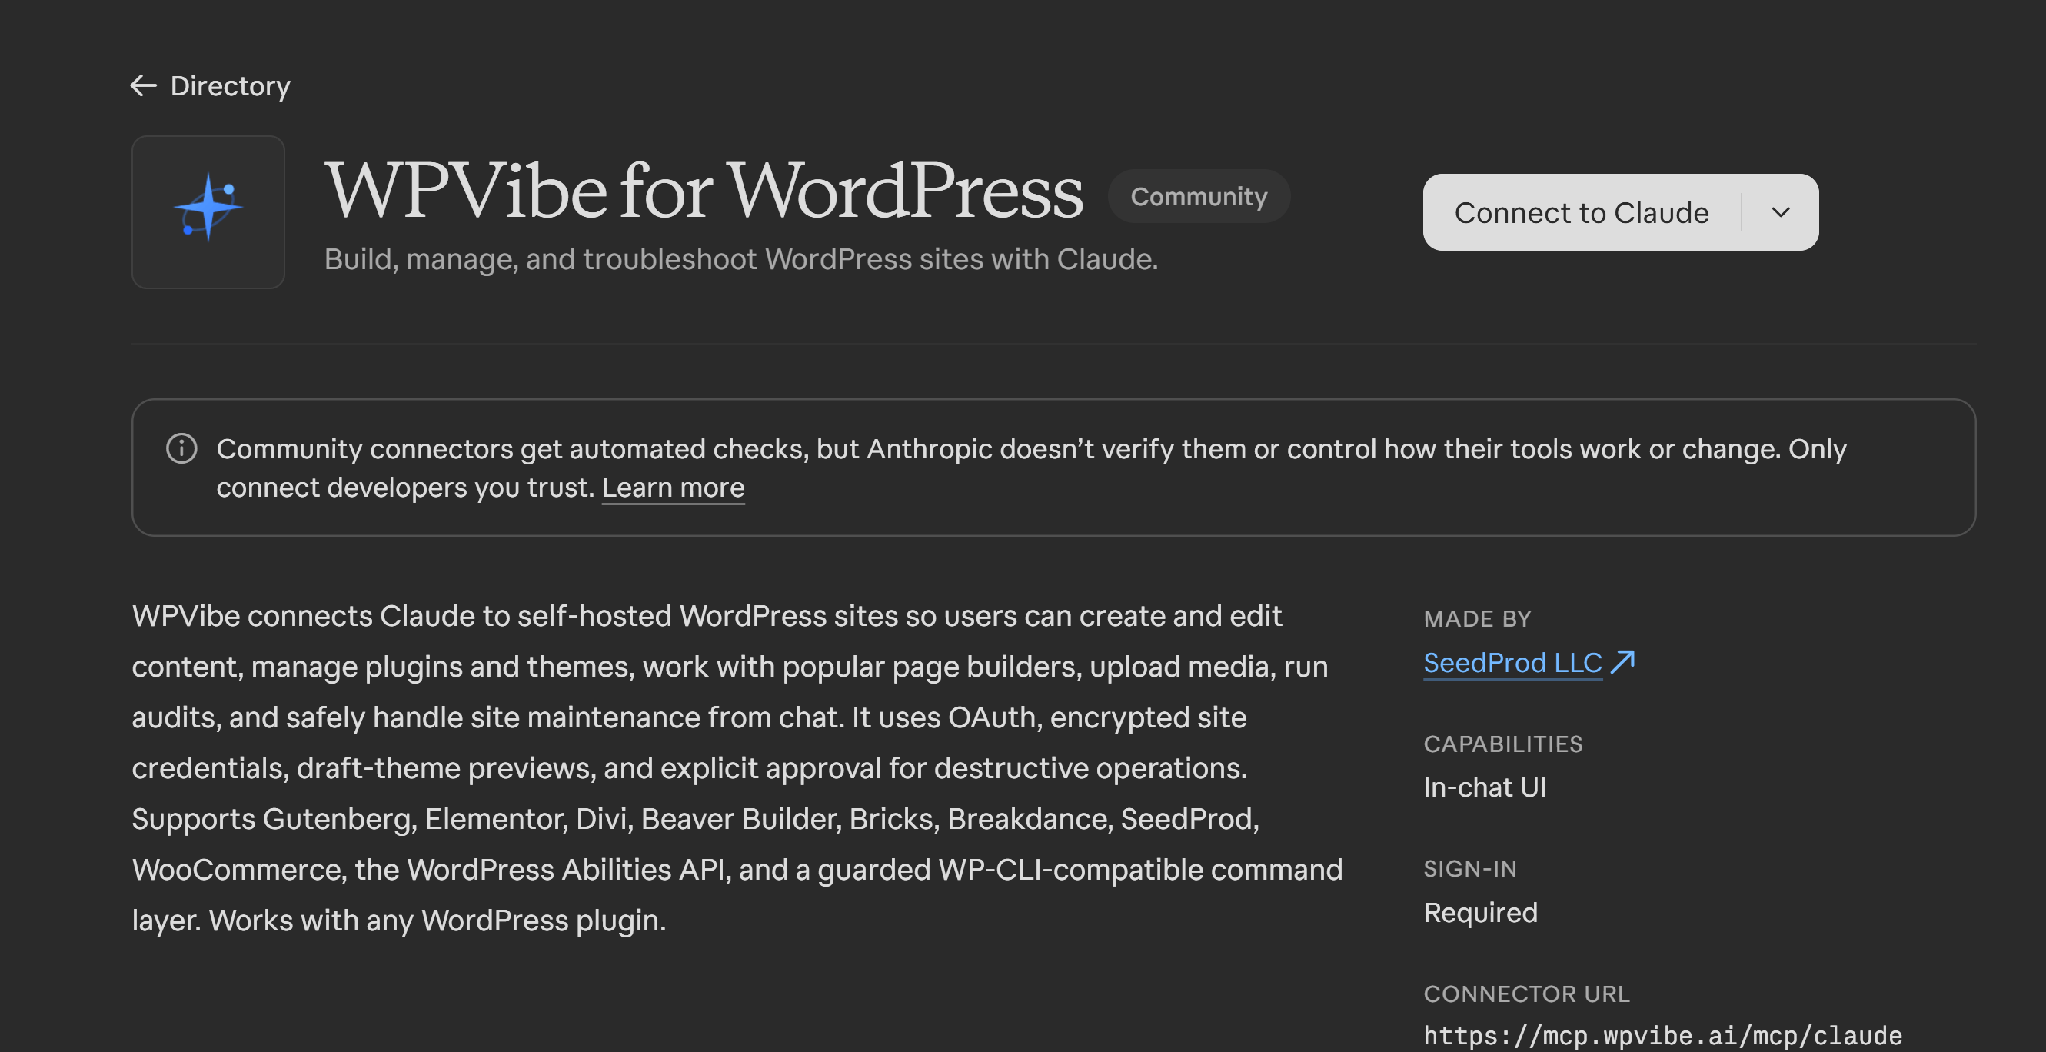
WPVibe for WordPress in Claude’s connectors directory, with the Connect to Claude button.
Sign in or sign up for WPVibe:
After you click Connect to Claude, a WPVibe sign-in page opens. It says Claude is asking for access to your WPVibe account, and that you’ll return to claude.ai once you sign in.
- Enter your email address. If you’re new to WPVibe, the same step creates your free account.
- Click Continue.
- WPVibe emails you a 6-digit code. There is no password to create. Enter the code to finish signing in.
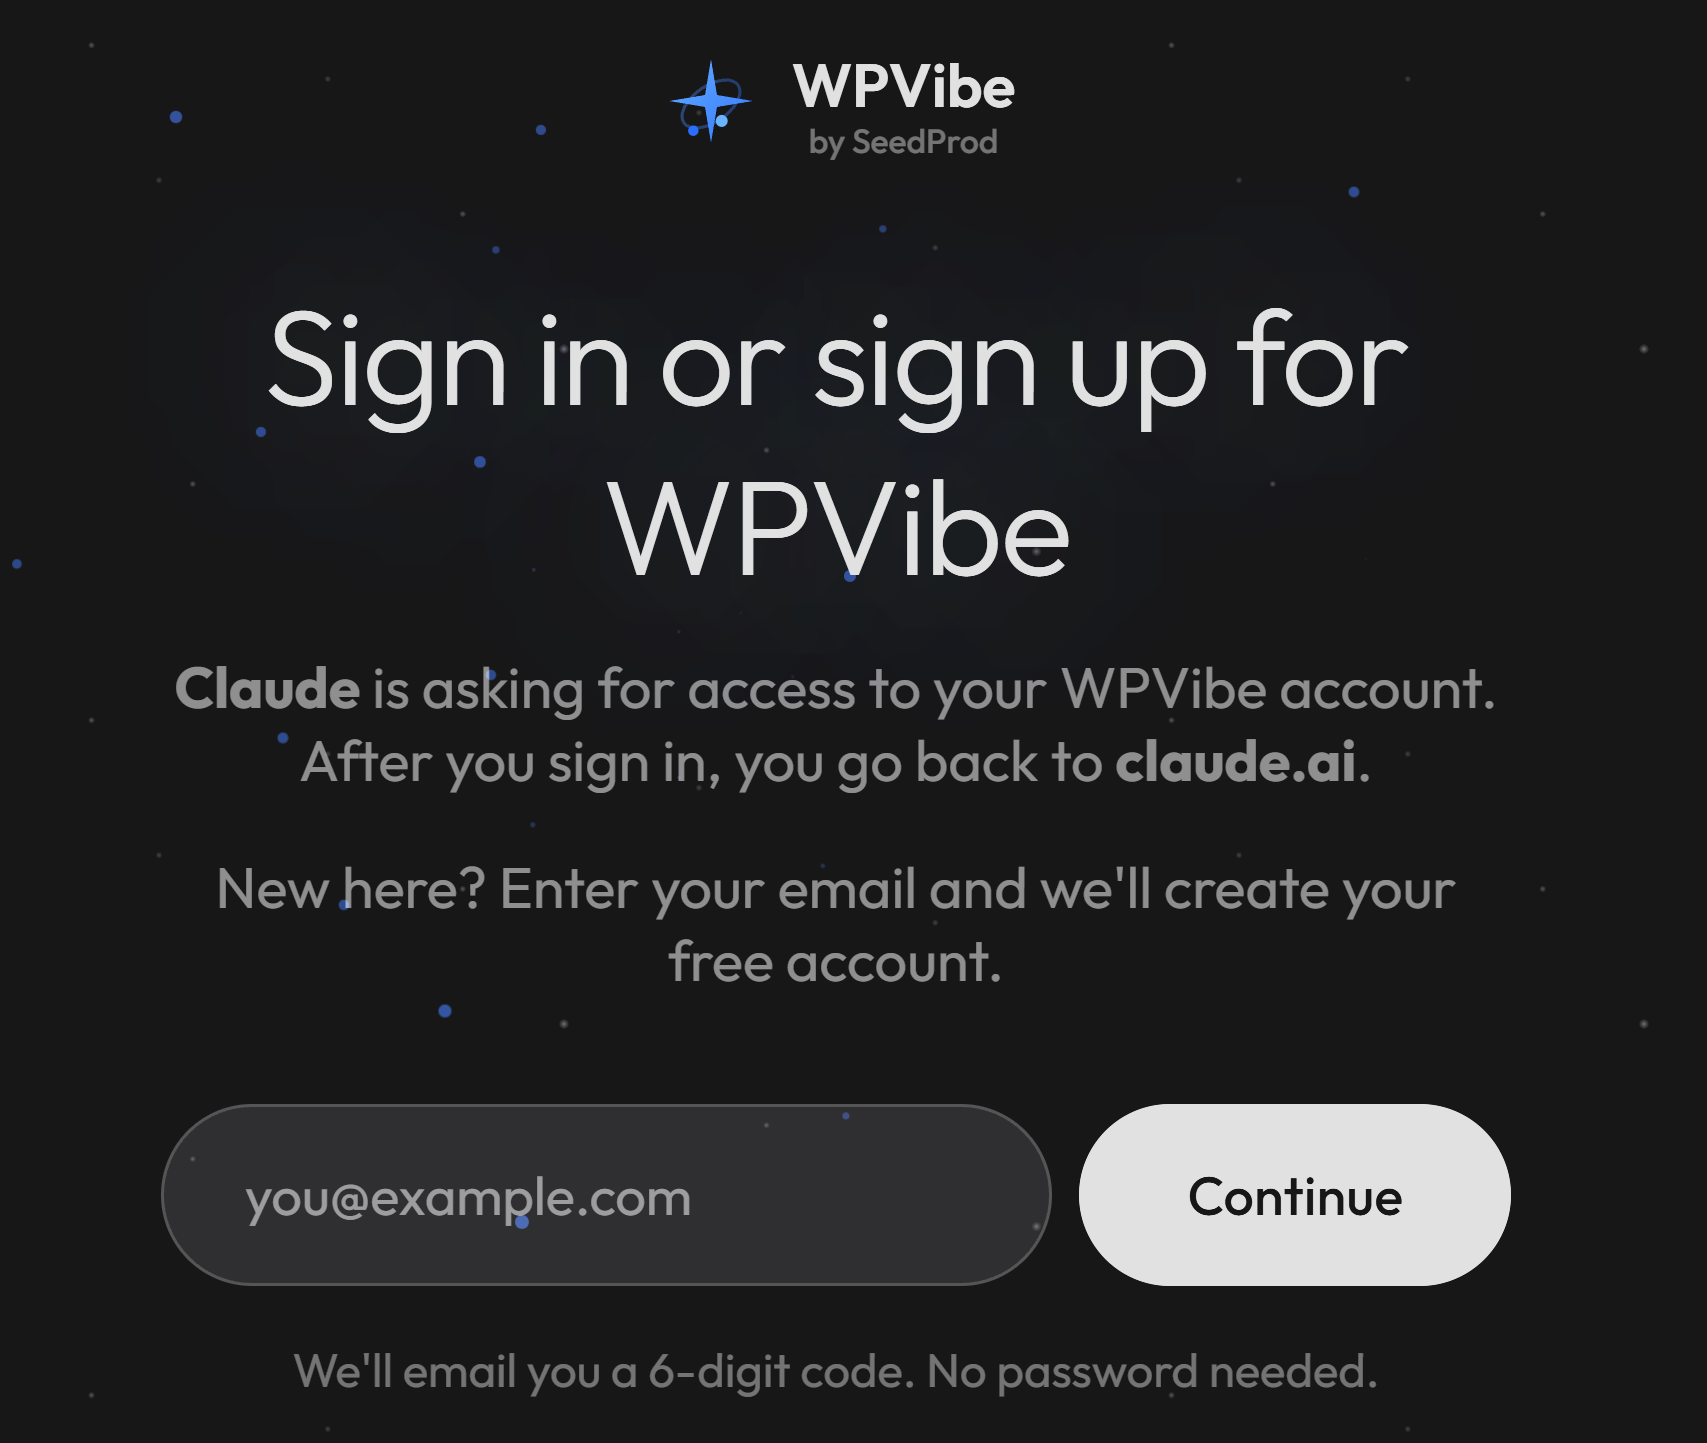
The WPVibe sign-in page with the email field and Continue button.
Confirm the connector is connected:
Once you finish signing in, you return to claude.ai. The WPVibe for WordPress page in the connectors directory now shows a Connected status in place of the Connect to Claude button. This confirms Claude is linked to your WPVibe account. Your WordPress site still needs to be connected in Step 3B.
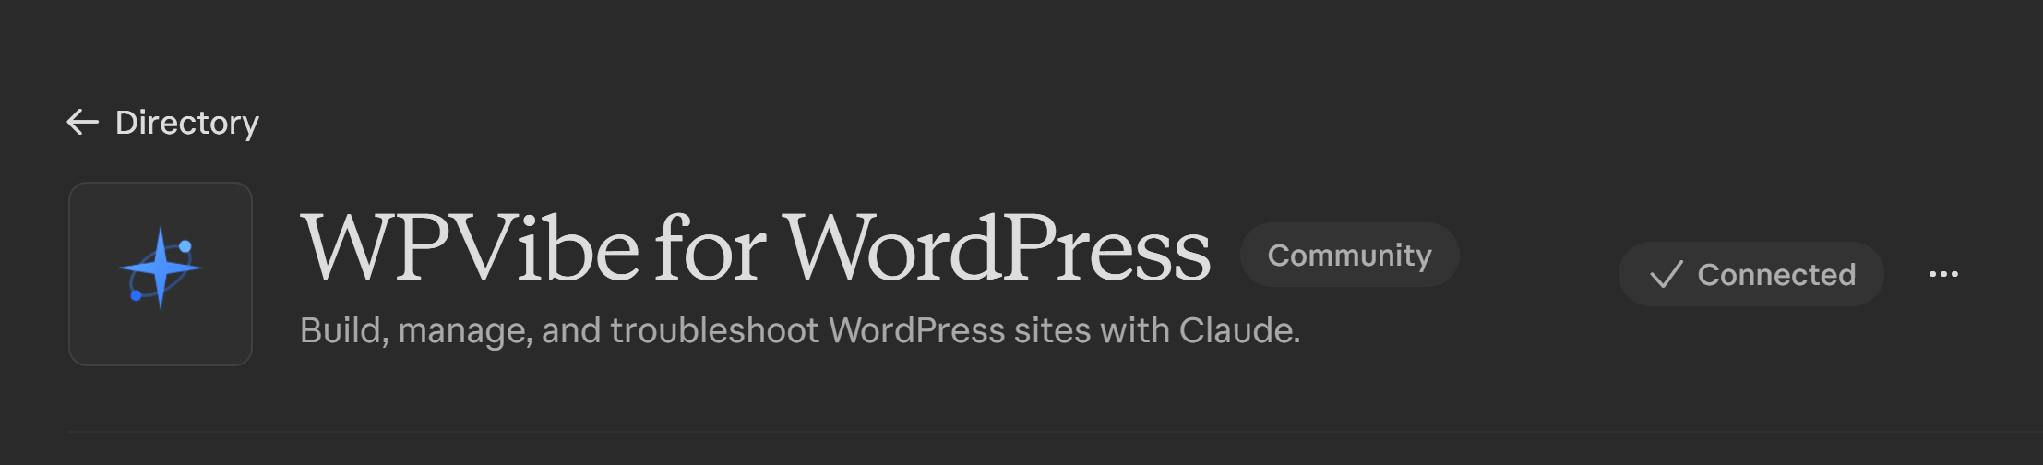
WPVibe for WordPress in Claude’s connectors directory showing Connected.
B. Tell your AI to connect your site
- In the Paste this into your AI to connect this site box, click Copy. The text reads like this, with your own site address:
Connect my site at https://yoursite.com
- Paste it into a chat with your AI assistant.
- The assistant replies with a link. Open it while you are logged in to your WordPress site, then approve access.
- Back on the WPVibe setup page, Step 3 turns green once you approve.
The WordPress Authorize Application page: The approval link opens a WordPress admin page titled Authorize Application. It says an application identifying itself as WPVibe, followed by a date and time, would like to connect to your account.
- New Application Password Name: WordPress fills this in for you, for example WPVibe-20261118-021152. Leave it as is. You’ll see this name later under Users > Profile > Application Passwords, where you can revoke it at any time.
- Yes, I approve of this connection: Click this to connect. WordPress sends you back to WPVibe with a new Application Password, which WPVibe stores securely. You never see or type the password.
- No, I do not approve of this connection: Click this to cancel.
If you see “Cookie check failed” after clicking Approve, reload the page and try again. If it repeats, open the link in a private window, log in to WordPress there, and approve. If that also fails, a cache or CDN may be serving cached wp-admin pages or stripping cookies on /wp-json/. Exclude both from caching.

The WordPress Authorize Application page with the Yes, I approve of this connection button.
If Wordfence has Application Passwords turned off and you used Allow for WPVibe in Step 2, the setup page notes that only a password created by WPVibe gets through, and your account has none yet. Approving the connection on the page below creates it.
Connection verified: After you click Yes, I approve of this connection, WPVibe opens a Connection verified page showing your site name. It says WPVibe signed in to your site and read it successfully. Below that it shows the Step 4 prompt with a Copy prompt button and the instruction to paste it into the chat you connected from. There is also a Having trouble? Check the connection link.
At this point the connection is verified for reading only. Publishing and uploads haven’t been tested yet, so make a small test change before you rely on them.

The Connection verified page with the Copy prompt button.
Step 4: Confirm your AI can read your site
This step checks that your AI assistant can actually reach your site through WPVibe. It is read-only, so nothing on your site changes.
- On the WPVibe setup page, find Step 4 and click Copy. The prompt reads like this, with your own site address:
Use WPVibe to read my site at https://yoursite.com (the site_info tool). Tell me the site name and address it returns. If it fails, show me the error and what to do next. Do not change anything.
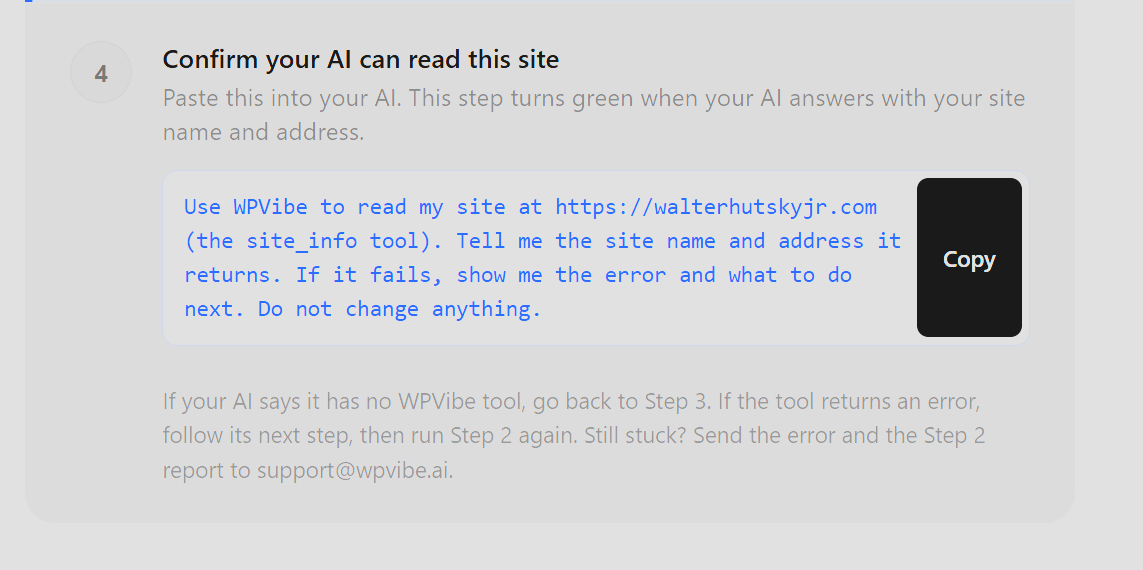
Step 4 showing the copyable “Use WPVibe to read my site” prompt.
- Paste it into your AI assistant.
- The assistant should answer with your site name and address. Step 4 turns green when it does.
Approve the tool in Claude: The first time Claude uses WPVibe, it pauses with a Needs your input prompt that reads “Claude wants to use Get Site Info from WPVibe for WordPress.” It shows the site URL it will read and offers three choices:
- Decline cancels the request.
- Allow once lets Claude run the tool this one time. Claude asks again next time.
- Always allow lets Claude run this tool without asking again.
Get Site Info only reads your site’s name, address, WordPress version, theme, and plugins, so any of the approve options is safe here. Later, when Claude asks to use tools that change your site, read the prompt before approving, and consider Allow once instead of Always allow.
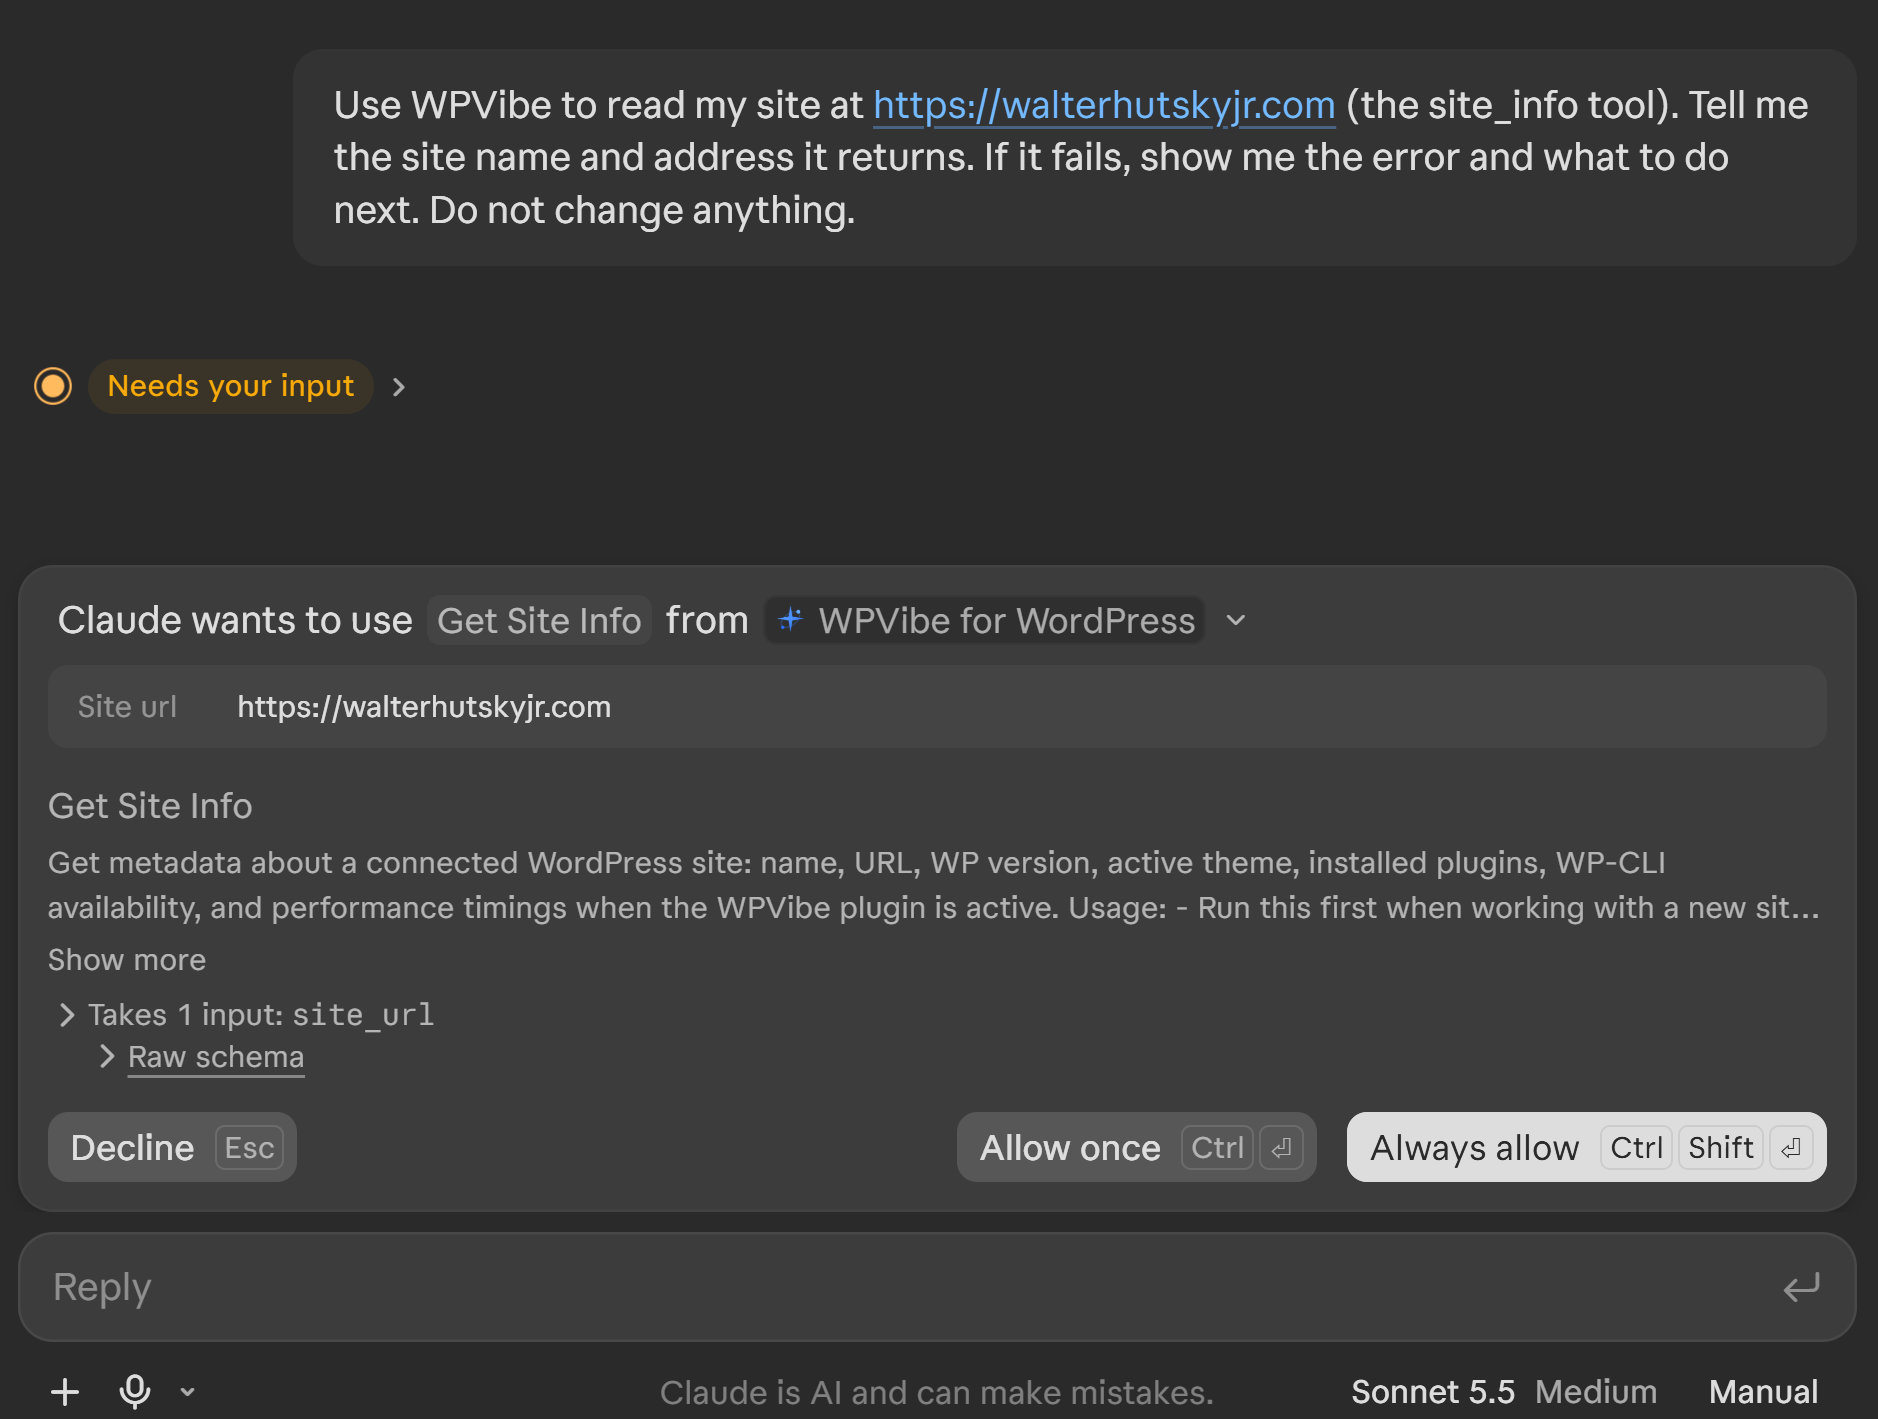
Claude’s “Needs your input” prompt for Get Site Info, with Decline, Allow once, and Always allow.
What a successful answer looks like: Claude reports your site name and address, such as “WalterHutskyJr.com” at https://walterhutskyjr.com. It may also list details such as your WordPress and PHP versions, your active theme, your installed plugins, and the WordPress user it connected as. Claude only reads this information and changes nothing.
Step 4 turns green: Back on the WPVibe page in WordPress, Step 4 changes to Your AI has used this site. It shows the time of the confirmation, in UTC, and the AI client that made the request, such as Anthropic/ClaudeAI/1.0.0 for Claude. A Test another AI client link lets you run the same check from a second assistant.
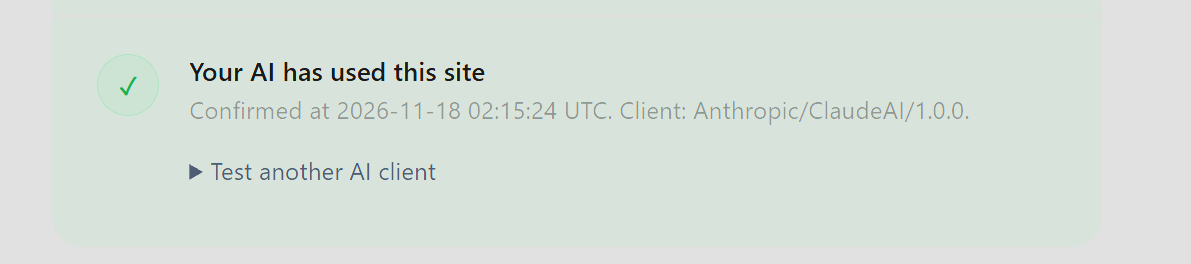
Step 4 confirmed, with the time and the client name.
If it doesn’t work
- Your AI says it has no WPVibe tool: go back to Step 3 and make sure WPVibe is added to your AI and your site is connected.
- The tool returns an error: follow the next step it gives you, then run the Step 2 connectivity check again.
- Still stuck: send the error and the Step 2 report to support@wpvibe.ai.
Try a starter prompt: Below the Step 4 prompt, the page offers a list headed After that, try one of these. Click Copy next to any prompt, then paste it into your AI chat. These are good first tests:
- Show recent WPForms submissions
- List my recent posts
- Show all installed plugins and which are active
- Run wp plugin list to see plugin status
- Show the files in my active theme (your theme’s name appears here)
The prompts are suggestions based on your site, so the WPForms and theme prompts only appear if your site has those. When you’re done, you can close the window.
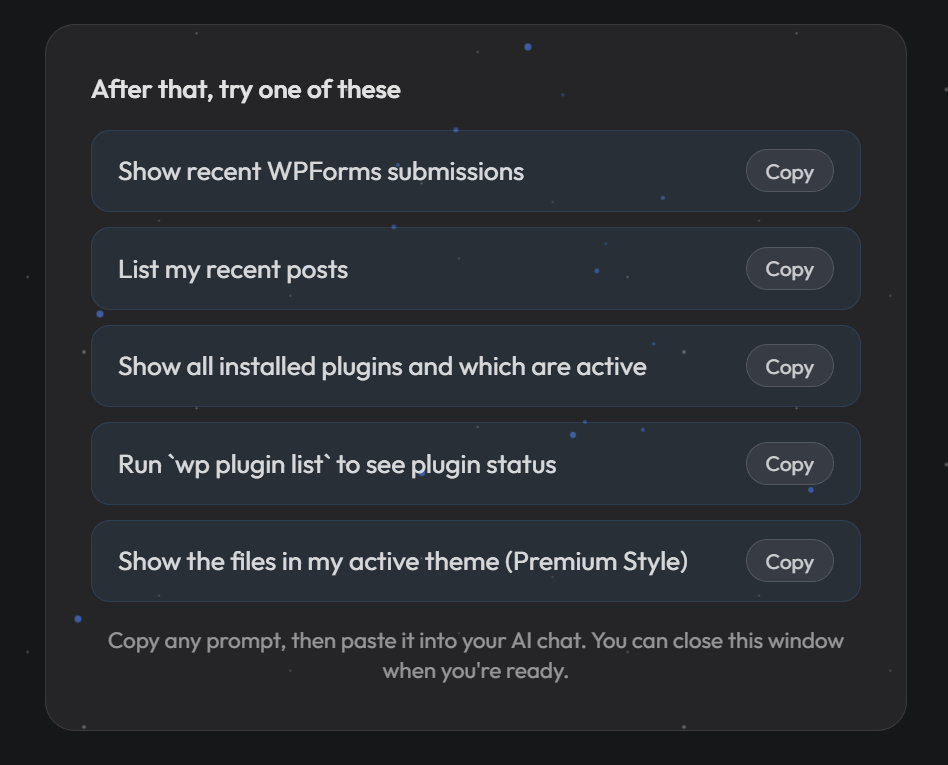
The “After that, try one of these” list of starter prompts.
Using WPVibe
Your site is connected. From here, you manage WordPress by asking. Start with requests that only read, since they can’t change anything.
Example: list your recent posts
Paste this into your AI chat, or use the List my recent posts starter prompt:
List my recent posts.
The assistant reads your posts through WordPress and answers with a list. Here is a sample of the result:
| Date | Title |
|---|---|
| Nov 17, 2026 | I Vibe Coded a Genealogy App with Cursor |
| Jul 12, 2026 | The 1889 Johnstown Flood- Elizabeth and Idella Reynolds |
| Jul 8, 2026 | PVT. JOHN R. VARNER (1836-1861) — The Brother Who Didn’t Return |
| Jul 5, 2026 | 250 Years of Freedom — And My Family Was Part of It From the Start |
| Jul 3, 2026 | 163 Years Ago Today — My Family Was There |
The real answer lists your 10 newest posts, newest first, with their publish status. Nothing on the site changes.
Screenshot: Claude’s answer to “List my recent posts.”
More read-only prompts to try
- “Show all installed plugins and which are active.”
- “Show the files in my active theme.”
- “Audit my home page for problems.”
WPVibe’s welcome email, sent once your site is connected, suggests three more safe first prompts:
- “Use WPVibe to list my plugins, theme, WordPress version, and anything that needs attention.” This confirms WPVibe can read your site before it touches anything.
- “What can WPVibe do with this site? Give me a few useful ideas based on what you can see.” The answer is based on your actual setup, not a generic list.
- “How much WPVibe usage do I have left?”
When you’re ready to make changes
- “Draft a new post called X from these notes.” Ask for a draft so you can review it before it goes live.
- “Edit the intro paragraph on my About page.”
- “Find a photo for this post and upload it to my media library.”
- “Build a new theme in a draft so I can preview it.”
Example: create a draft post
Once reading works, try a small change that is easy to undo. Paste this into your AI chat:
Make a new post called WPVibe Success!
Because this changes your site, Claude pauses with a Needs your input prompt before it acts. This time it names a write tool, WordPress REST API (write), and shows the exact request it will send.

Claude asks permission to create the post, with the full request visible.
Read the request before you approve it. Each line tells you something:
| Line | In this example | What it means |
|---|---|---|
| Method | POST | Create something new. PUT updates an existing item, and DELETE removes one. |
| Route | /wp/v2/posts | The WordPress REST API endpoint for posts. |
| Site url | Your site address | Which connected site the request goes to. |
| Body | {“title”: “WPVibe Success!”, “status”: “draft”} | The data being sent: a post title, saved as a draft. |
| Fields | id,status,title,link | What WordPress should send back, so Claude can confirm the result. |
The tool’s description in the prompt also notes a safety rule: a DELETE moves an item to the trash where WordPress keeps one, instead of erasing it. WPVibe also saves new posts and pages as drafts unless the request says otherwise.
For a change like this, Allow once is the careful choice. WordPress then returns the new post’s ID, status, title, and link, and Claude tells you the draft was created. Open Posts > All Posts in WordPress to see WPVibe Success! in the list with a Draft label. Nothing is public until you publish it.
Example: create and publish a post
To make the post public in one step, say so in your prompt:
Make a new post called WPVibe a Success! then publish it.
Claude uses the same WordPress REST API (write) tool and shows the same prompt. One line is different: in the Body, status is now publish instead of draft. That is the line to check before you approve, because it makes the post visible to everyone as soon as WordPress saves it.

The request this time: POST to /wp/v2/posts with the status set to publish.
After you allow it, WordPress returns the new post’s ID, status, title, and link, and Claude reports that the post is live.
Proof it worked: Open the post’s address in a browser, and it loads on your public site, with your theme, title, author, publish date, and category.
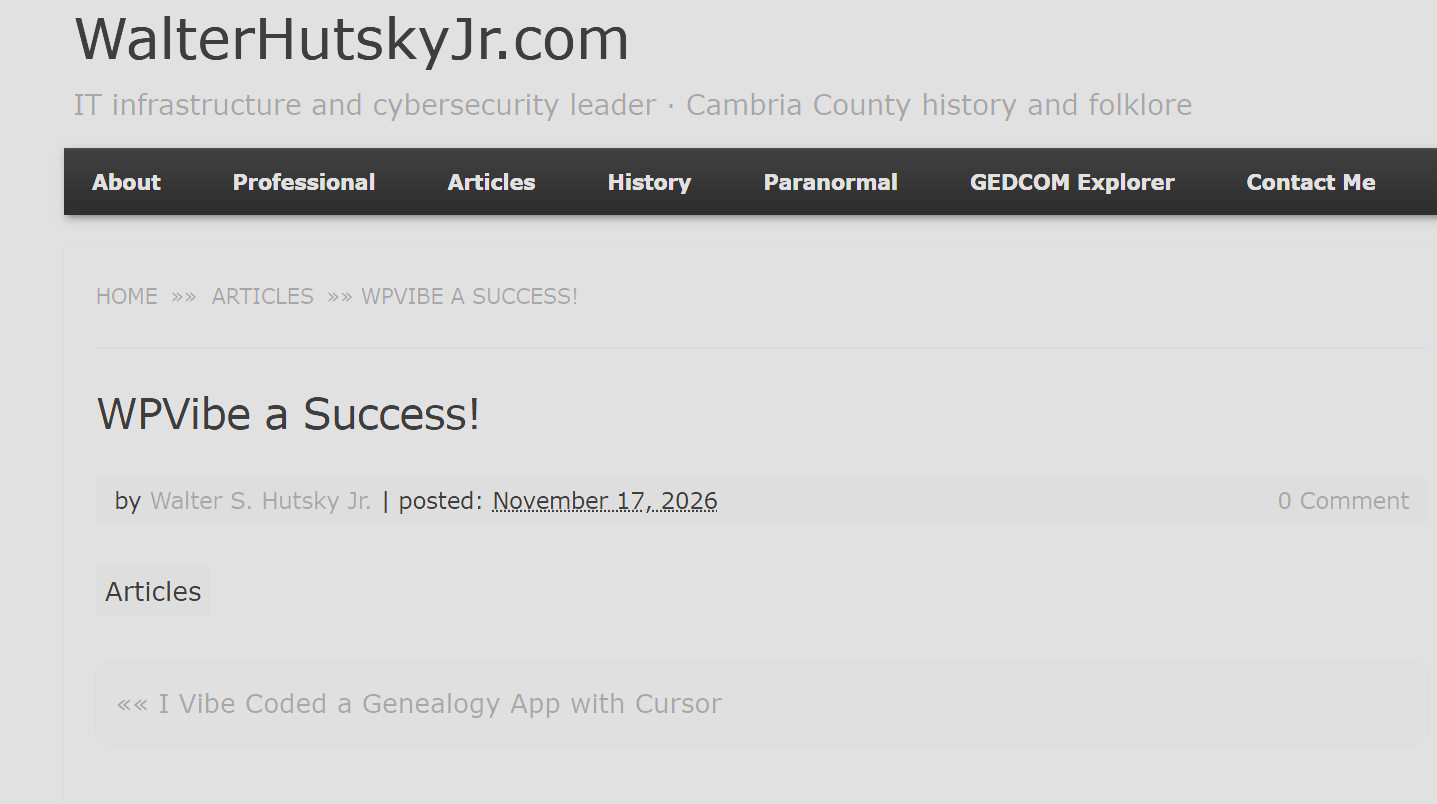
The published post on the live site, created from one sentence in Claude.
The post here has only a title, so its page is otherwise empty. To include content, put it in your prompt, for example “with this text: …”. If you publish by mistake, open Posts > All Posts in WordPress and either switch the post back to Draft or move it to the trash.
Before you approve a change, read what Claude says it will do. Take a backup before publishing a theme or deleting content, and review the WPVibe > Approval Log afterward to see what was approved.
Usage limits
WPVibe caps how many calls your account can make in a rolling 24-hour window. As of November 2026, WPVibe’s welcome email lists these limits:
| Plan | Calls per rolling 24 hours |
|---|---|
| Free | 100 |
| Pro | 500 |
| New-account bonus | 300, for the first week only |
The bonus replaces the Free cap during your first week, then the account drops back to 100. To see where you stand, ask your AI “How much WPVibe usage do I have left?” or open your WPVibe account page at https://mcp.wpvibe.ai/account. Because a limit can stop a long task partway through, check your usage before you start a large batch of changes.
Settings to know about
The WPVibe page in WordPress has two settings that change how much control you keep.
White label hides WPVibe everywhere in your WordPress dashboard: the admin menu, the dashboard widget, the Plugins list entry, and the editor sidebar. It is meant for agencies that manage a site for a client. The site stays connected and your AI can still manage it. Once you hide WPVibe, the settings page disappears too. To bring it back, ask your AI to disable white label mode, or delete the wpvibe_hide_from_admins option with WP-CLI. If the site goes 30 days without WPVibe activity, the plugin reappears on its own. While it’s hidden, WordPress auto-updates are turned on for WPVibe so it stays current. Leave this off unless you have a reason to hide the plugin.
Approvals has a checkbox labeled Dangerously bypass approvals, which is off by default. Turned on, WPVibe runs every AI change with no approval prompt, including deletes, raw SQL, code snippets, and user and role changes. WPVibe warns that anything your AI reads on the site, such as reviews, comments, or form entries, could steer it into making those changes. Use it only for unattended or bulk work you trust, and turn it off when you’re done. Click Save to apply a change.
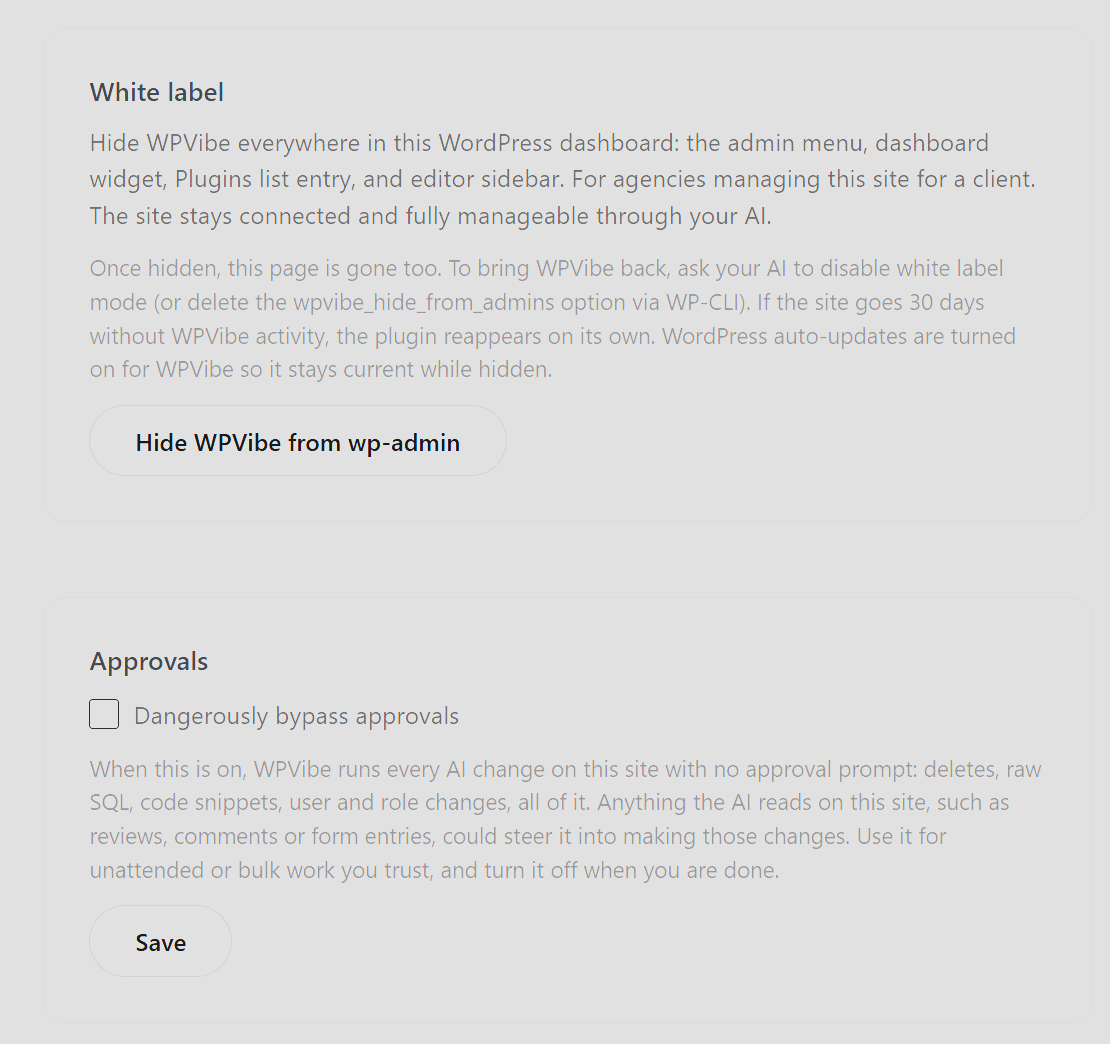
The White label and Approvals settings on the WPVibe page.
Security and control
WPVibe can change your site, so it helps to know how to limit what it does and how to shut it off.
Control which tools Claude can use
An MCP server publishes tools, and your AI client decides how much freedom each one gets. In Claude, open your connector’s settings (Settings > Customize > Your connectors > WPVibe for WordPress) to see what the connector offers and set the rules.

Claude’s connector settings for WPVibe for WordPress, with the Tool permissions section.
This page shows three useful things:
- What the connector claims to do. The description says WPVibe uses OAuth, encrypted site credentials, draft-theme previews, and explicit approval for destructive operations. It lists support for Gutenberg, Elementor, Divi, Beaver Builder, Bricks, Breakdance, SeedProd, WooCommerce, the WordPress Abilities API, and a guarded WP-CLI-compatible command layer.
- Tool permissions. Tools are grouped, and each group or individual tool can be set to allow, needs approval, or block. The screenshot shows the Interactive tools group set to Needs approval, with Request Image Upload as one of its tools. This is the same choice as Allow once and Always allow in the pop-up prompt, set ahead of time.
- Where your data goes. Each tool states which server it sends data to. For WPVibe, that is mcp.wpvibe.ai.
The page distinguishes two modes. In Manual mode, your tool settings decide when Claude must ask you. In Auto mode, an automated check blocks actions it flags as risky, but Claude may otherwise act without asking, even for tools set to Needs approval. If you want a prompt before every change to your site, use Manual mode and keep the tools that change content on Needs approval.
The Disconnect button on this page removes the connector from Claude. To fully cut off access, also revoke the Application Password in WordPress, because WPVibe stores that credential separately.
Review or revoke WPVibe’s access in WordPress
The credential WPVibe uses is a standard WordPress Application Password, and you can see it and cancel it at any time.
- In your WordPress dashboard, go to Users > Profile.
- Scroll to the bottom, to the Application Passwords section.
- Find the entry named WPVibe- followed by a date and time. This is the password you approved on the Authorize Application page.
- Check the Created and Last Used columns to see when it was made and when it was last used.
- To cut off WPVibe’s access, click Revoke on that row. WPVibe can no longer reach your site until you connect it again with Step 3B.

The Application Passwords section of your WordPress profile, with the WPVibe password and its Revoke button.
WordPress describes these passwords as a way to authenticate through non-interactive systems, such as the REST API, without giving out your real password, and notes that they can’t be used for traditional logins to your site. You never need to click Add Application Password yourself, because WPVibe creates its own during approval. Avoid Revoke all application passwords unless you mean it, since it also cancels passwords that other tools use.
Troubleshooting at a glance
| Symptom | Likely cause | What to do |
|---|---|---|
| HTTP 500 or “did not return JSON” in the connectivity check | A security plugin’s firewall blocking the request (Wordfence on my site) | Retry once. Then check Wordfence Live Traffic, add an allowlist exception or use Learning Mode, and send the report to your host and WPVibe if it repeats. |
| “Application Passwords are turned off by Wordfence” | Wordfence’s setting that disables Application Passwords | Click Allow for WPVibe, or turn off that setting in Wordfence. |
| “Cookie check failed” when you click Approve | A stale approval page, or a cache or CDN serving cached wp-admin pages | Reload and approve again, try a private window, and exclude wp-admin and /wp-json/ from caching. |
| “No credentials found” for your site | The site isn’t connected to your WPVibe account yet | Run the “Connect my site” prompt from Step 3B and approve the link. |
| The approval link doesn’t work | The link expires after one hour | Ask your AI to connect the site again to get a new link. |
| Your AI says it has no WPVibe tool | The connector isn’t added or enabled in your AI | Go back to Step 3A and check the connector’s settings. |
| Step 4 doesn’t turn green | WPVibe hasn’t seen a successful read from your AI yet | Paste the Step 4 prompt again, or use Having trouble? Check the connection. |
What I built
I connected my WordPress site to Claude through WPVibe and MCP, then tested it in careful steps: read-only requests first, then a draft post, then a published post, each approved in Claude before it ran. Along the way, I learned five things:
- Start with read-only requests, since they can’t change your site.
- Read the request before you approve it. The Method, Route, and Body lines tell you exactly what will happen.
- A security plugin’s firewall can break the connection. Wordfence caused my 500 error, and I turned it back on once WPVibe was working.
- The pieces are separate: an AI client, an MCP server, a WordPress plugin, and two sign-ins. Knowing which is which makes problems easier to trace.
- You can always cut access off, in Claude and in WordPress.
Next steps
To keep learning:
- WPVibe cookbook: ready-to-paste prompts at https://wpvibe.ai/cookbook/
- Community: WPVibe users share prompts and workflows at r/WPVibeAI on Reddit, https://www.reddit.com/r/WPVibeAI/
- Your account and usage: https://mcp.wpvibe.ai/account
